How To Create A WordPress Contact Form That Improves Service, Generates Leads, & Provides Support
The Contact Form on a website can be a powerful Customer Service, Sales, and Support tool...

The Contact Form on a website can be a powerful Customer Service, Sales, and Support tool.
A single contact form can:
- Capture questions, comments, and feedback.
- Collect requests for product/service information.
- Make it easy for users to submit support requests.
What follows is My Contact Form Recipe. It works with Form Builders that have these features:
- Name Field
- Text Field
- Text Area Field
- Radio Button Field
- Checkbox Field
- File Upload Field
- Conditional Logic Settings (for each field)
Here’s a sample of my Contact Form Recipe for your reference. Let’s get started.
The Typical Contact Form
First, most website contact forms are not only functionally useless, they hurt the brand.
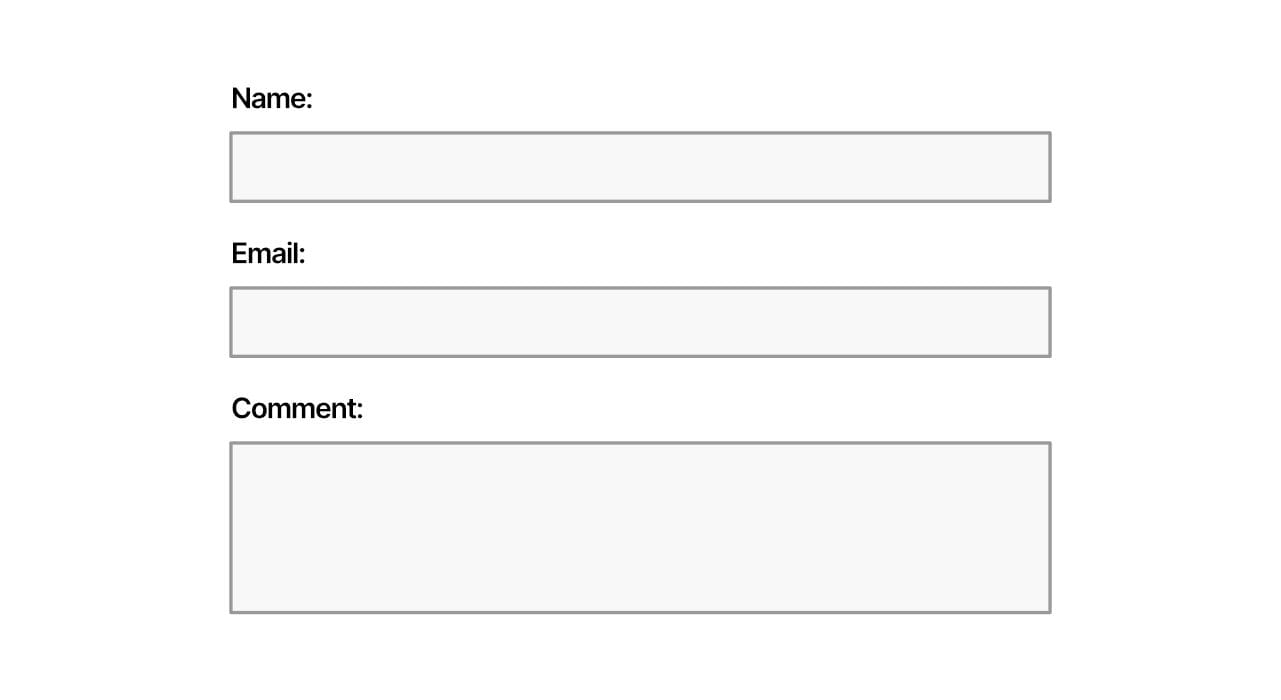
A typical website contact form has these 3 fields:
- Name
- Comments
This is really ineffective. Here’s why...
- Users can enter either a first name, or both a first and last name.
- You must read the Comments to learn why they are contacting you. (Very time-consuming.)
- The reason for contacting you and any details they provide are buried in the Comment text. You cannot easily segment out and track the kinds of requests you receive. And you cannot setup automated email responses.
There’s a better way.
The Requirements
I recommend creating a contact form that makes it easy to collect requests for these 3 key business areas:
- Customer Service
- Sales
- Technical Support
The Web Guy’s Contact Form Recipe
1 | Collect Contact Information
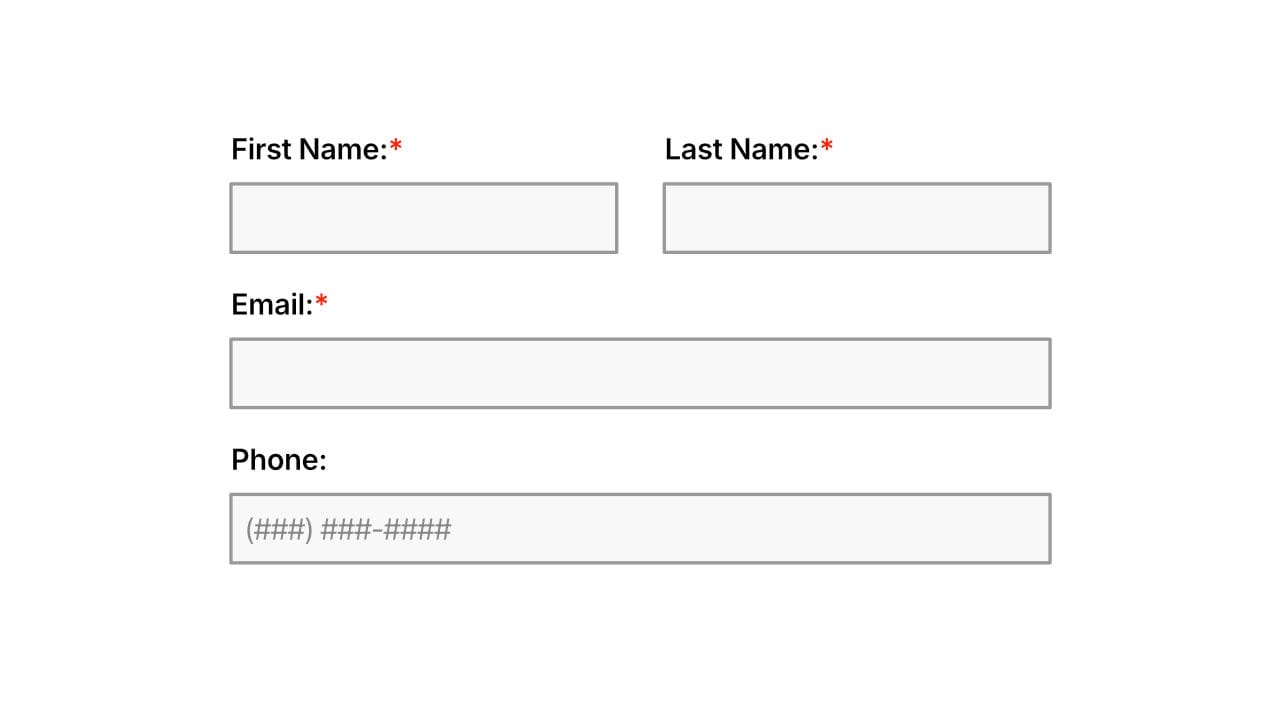
Collect essential contact information in formats that enable you to use the data to segment and automate marketing, sales, and support communications.
- Create a First Name field (Make the field “Required”.)
- Create a Last Name field (Make the field “Required”.)
- Create an Email field (Make the field “Required” and enable validation.)
- Create a Phone field (Use a field Mask to restrict the format that gets entered. Use either of these formats for U.S. phone numbers: (###) ###-### -or- ###-###-####)
2 | The “Why are you contacting us?” Field
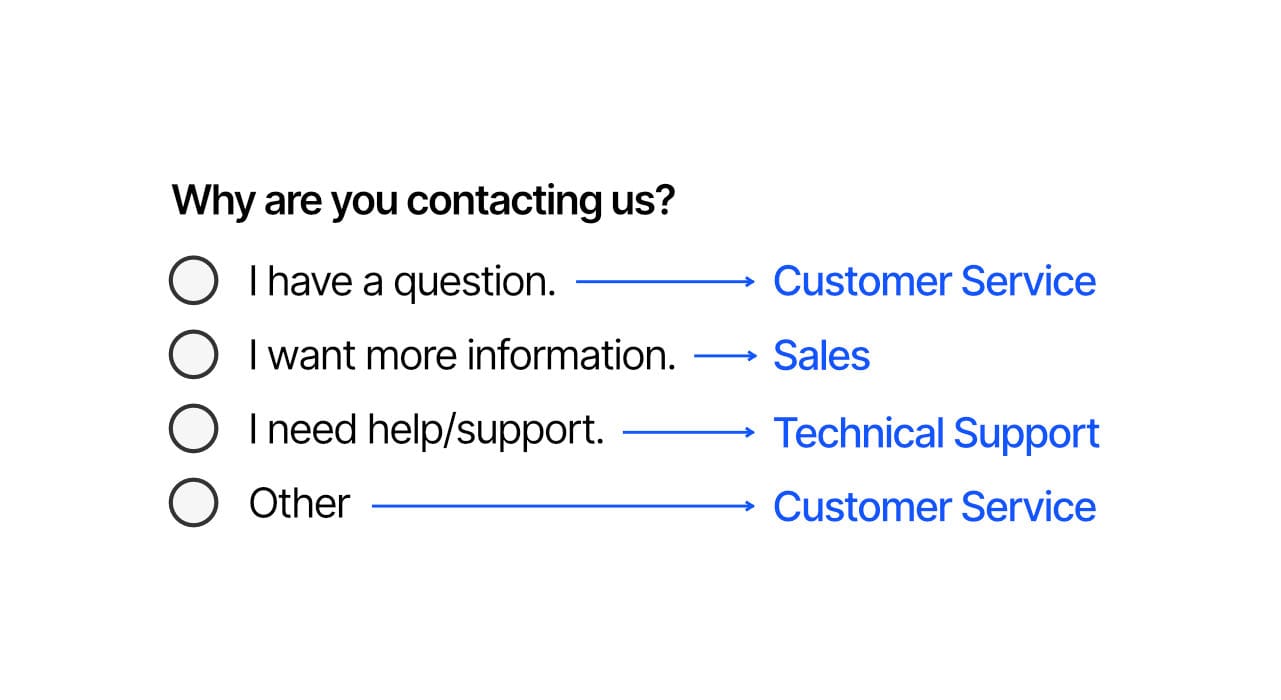
Create a Radio Button field with the label “Why are you contacting us?”
A Radio Button field limits the user to selecting only one of the available field Option values.
Create these 4 Option values:
- I have a question. - Question submissions go to your Customer Service person/team.
- I want more information. - Information submissions go to your Sales person/team.
- I need help/support. - Help/Support submissions go to your Support person/team.
- Other - Other submissions go to your Customer Service person/team.
This field and these 4 option values instantly qualify and segment your contact form submissions. This makes it easy to know precisely what a user wants.
Next
3 | The “What’s your question?” Field
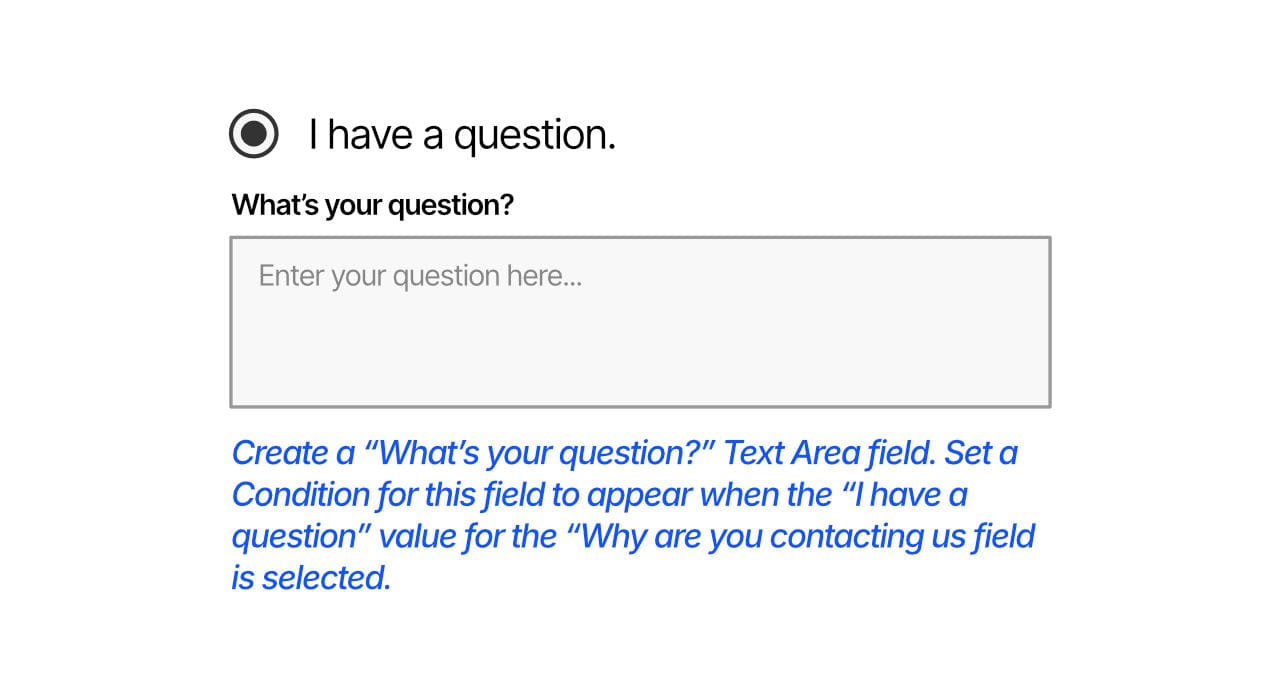
When a user selects the “I have a question” option, we want a “What’s your question?” Text Area field to appear (below the “Why are you contacting us?” field).
Follow these steps:
- Create a “What’s your question?” Text Area field in your Contact Form.
- Set a “Condition” for this field so the field is visible when the “Why are you contacting us?” fields “I have a question” option is selected.
4 | The “Which Service(s) are you interested in? Field
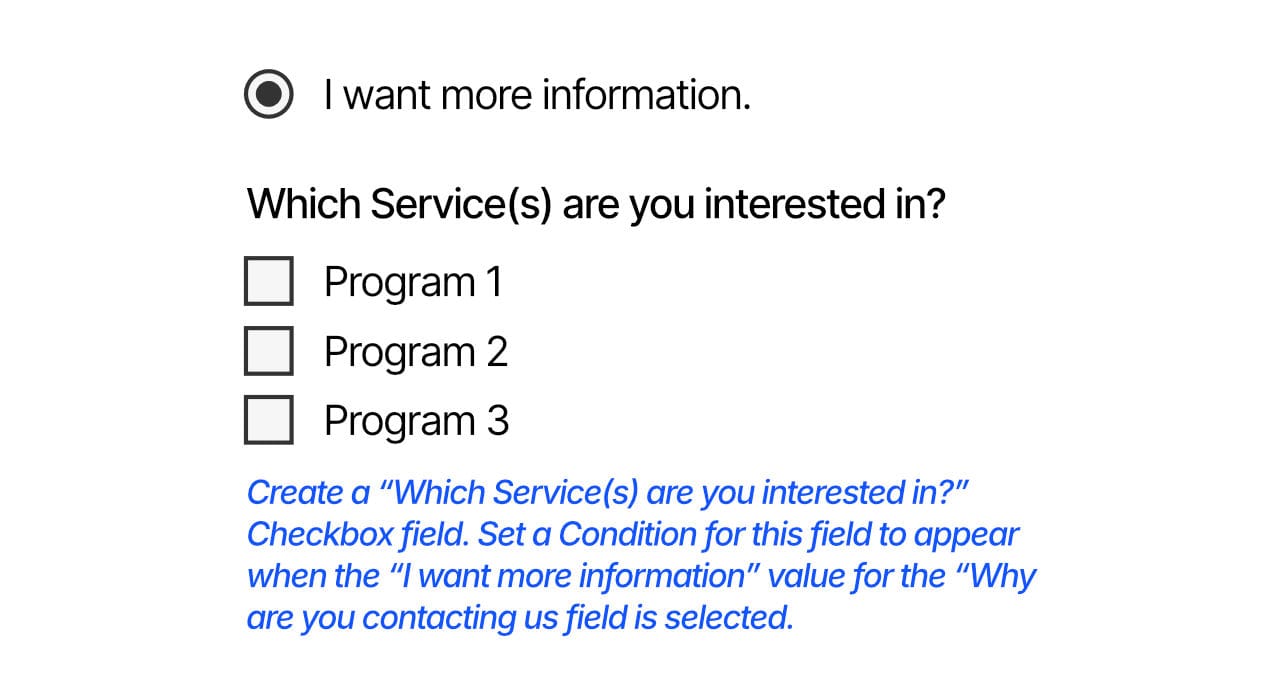
When a user selects the “I want more information” option, we want a “Which Service(s) are you interested in?” Checkbox field to appear (below the “Why are you contacting us?” field).
Follow these steps:
- Create a “Which Service(s) are you interested in?” Checkbox field in your Contact Form.
- Set a “Condition” for this field so the field is visible when the “Why are you contacting us?” fields “I want more information” option is selected.
5 | The “I need help/support” Fields
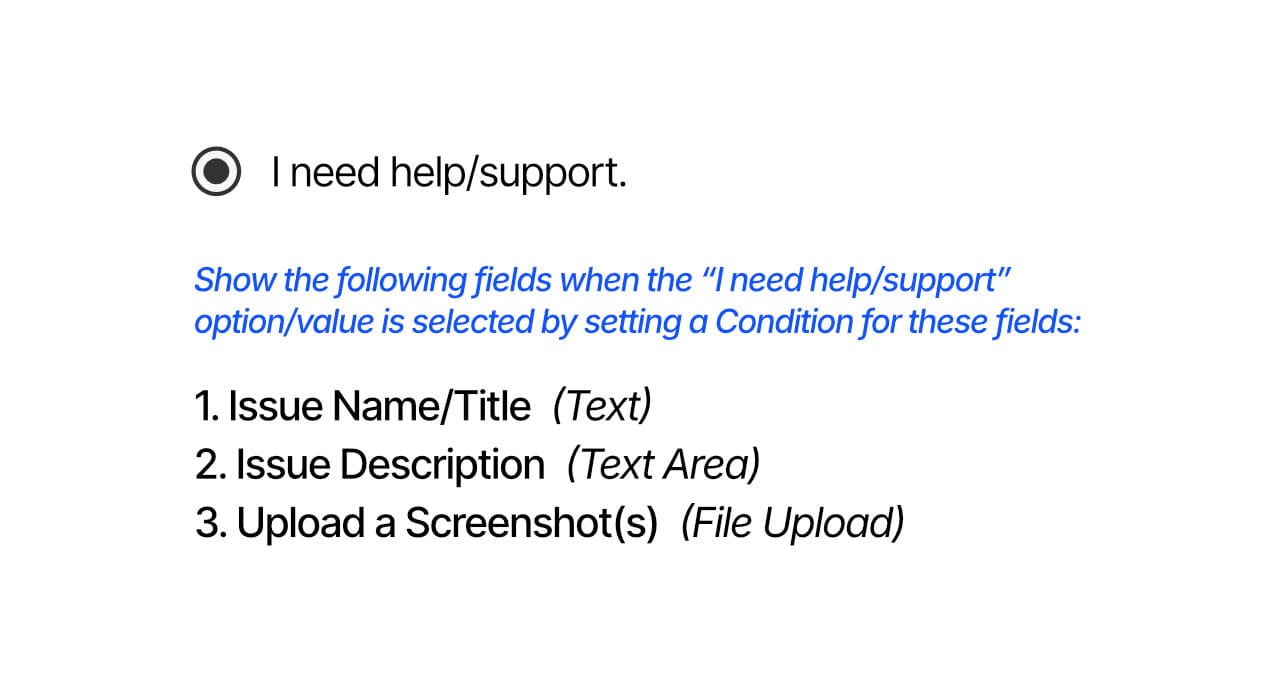
When a user selects the “I need help/support” option, we want 3 fields to appear (below the “Why are you contacting us?” field):
- Issue Name/Title (Text field)
- Issue Description (Text Area field)
- Upload a Screenshot(s) (File Upload field)
Follow these steps:
- Create an “Issue Name/Title” Text field in your Contact Form.
- Set a “Condition” for the “Issue Name/Title” Text field so the field is visible when the “Why are you contacting us?” fields “I need help/support” option is selected.
- Create an “Issue Description” Text Area field in your Contact Form.
- Set a “Condition” for the “Issue Description” Text Area field so the field is visible when the “Why are you contacting us?” fields “I need help/support” option is selected.
- Create an “Upload a Screenshot(s)” File Upload field in your Contact Form.
- Set a “Condition” for the “Upload a Screenshot(s)” File Upload field so the field is visible when the “Why are you contacting us?” fields “I need help/support” option is selected.
- Set a Max File Size limit of 1 MB for the “Upload a Screenshot(s)” File Upload field.
- Set the “Max # Files” limit to 3, 4, or 5 for the “Upload a Screenshot(s)” File Upload field.
6 | The “Comments | Testimonials | Other” Field
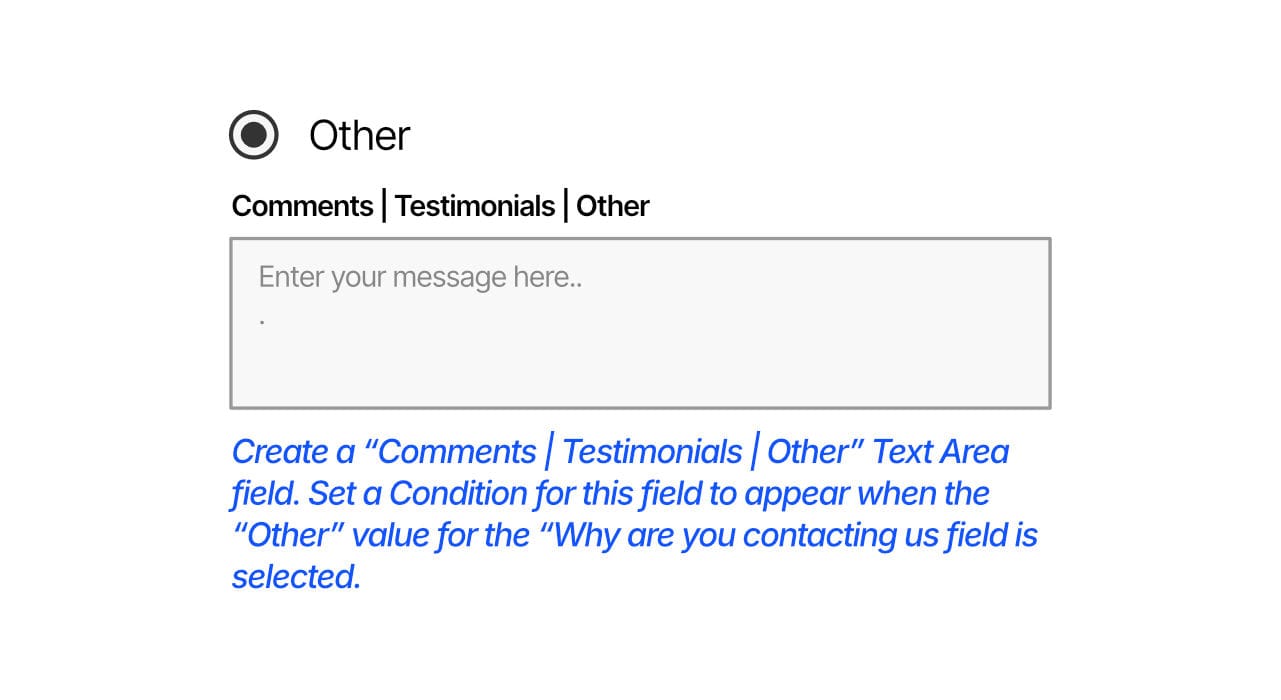
When a user selects the “Other” option, we want a “Comments | Testimonials | Other” Text Area field to appear (below the “Why are you contacting us?” field).
Follow these steps:
- Create a “Comments | Testimonials | Other” Text Area field in your Contact Form.
- Set a “Condition” for this field so the field is visible when the “Why are you contacting us?” fields “Other” option is selected.
7 | Add SPAM Protection
Be sure to add a SPAM Protection field to your Contact From. There are three main types of form protection services.
Honeypot protection is an included feature in many WordPress form plugins. You can use one these, or combine reCaptcha or hCaptcha with Honeypot to protect your forms.
8 | Alert Staff/Team Members
Last, but not least we want to send an email alert to staff/team members whenever the form gets submitted.
The cool part is we will send an alert to a different staff/team member depending on which answer they select to the “Why are you contacting us?” question. This way the staff/team member responsible for that area will receive alerts related only to their area. This saves a ton of valuable time spent scanning emails.
For this example, I will use the Conditions settings in Fluent Forms Pro to do this. Fluent Forms Pro must be installed and activated on your WordPress site. You can use other form builders that have similar features.
A) Login to your WordPress admin.
B) Go to Fluent Forms Pro > Forms.
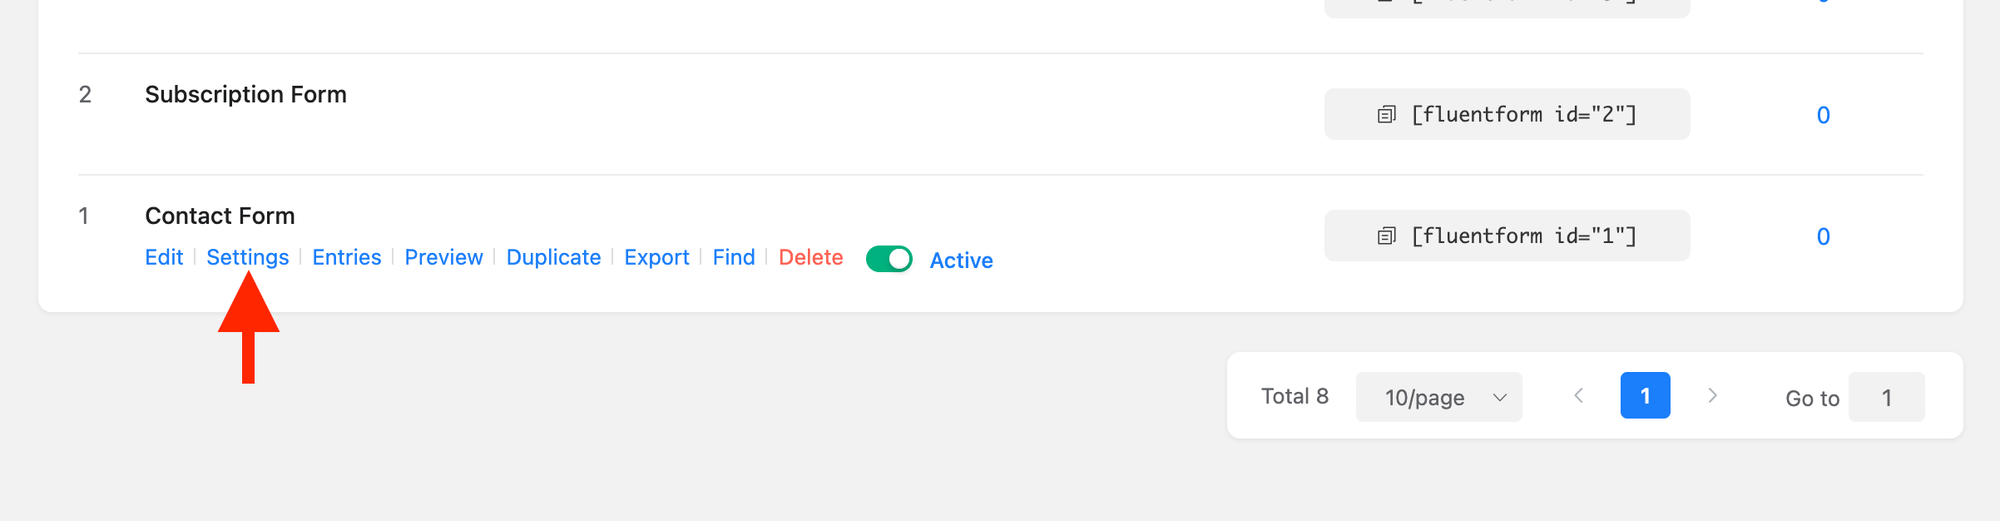
C) Locate your Contact Form, hover over the form name, and click the Settings link.
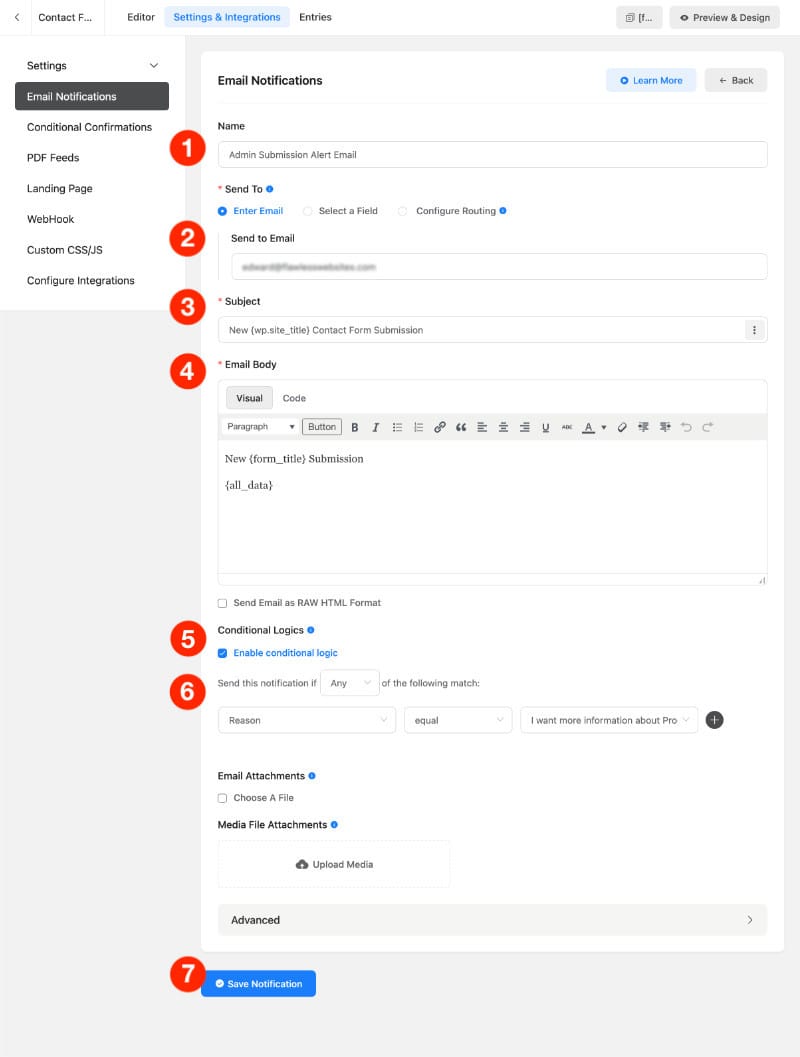
On the form Settings page, click Email Notifications. Next, follow these directions to create Email
1) Enter a Name for the Email Notification.
2) Under “Send To” click the Enter Email, then enter the email address for the staff/team member who will receive the form submission alert email.
3) Enter a Subject for the email.
4) Enter Email Body text. Include a tag/shortcode that will display all the data submitted in the form.
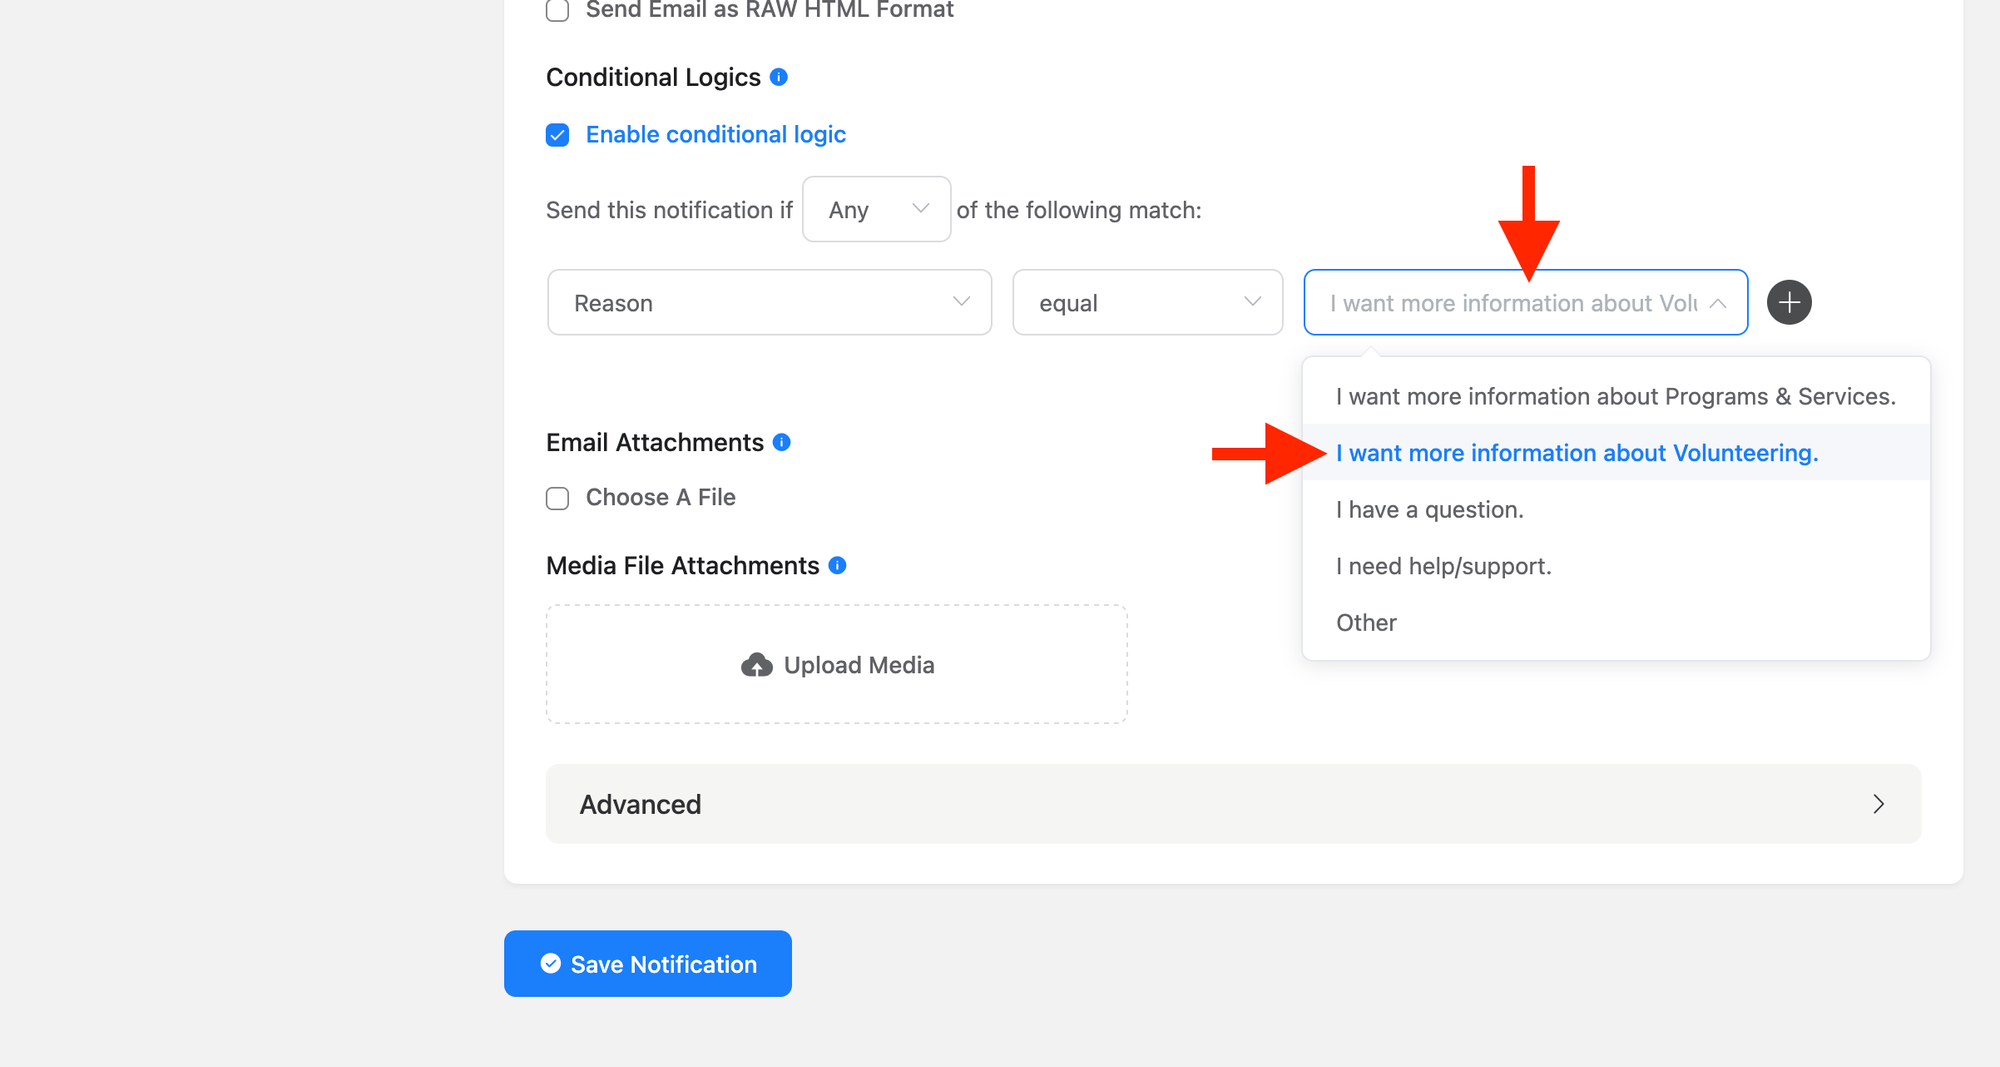
5) Enable Conditional Logic feature. (This feature is only available with Fluent Forms Pro.)
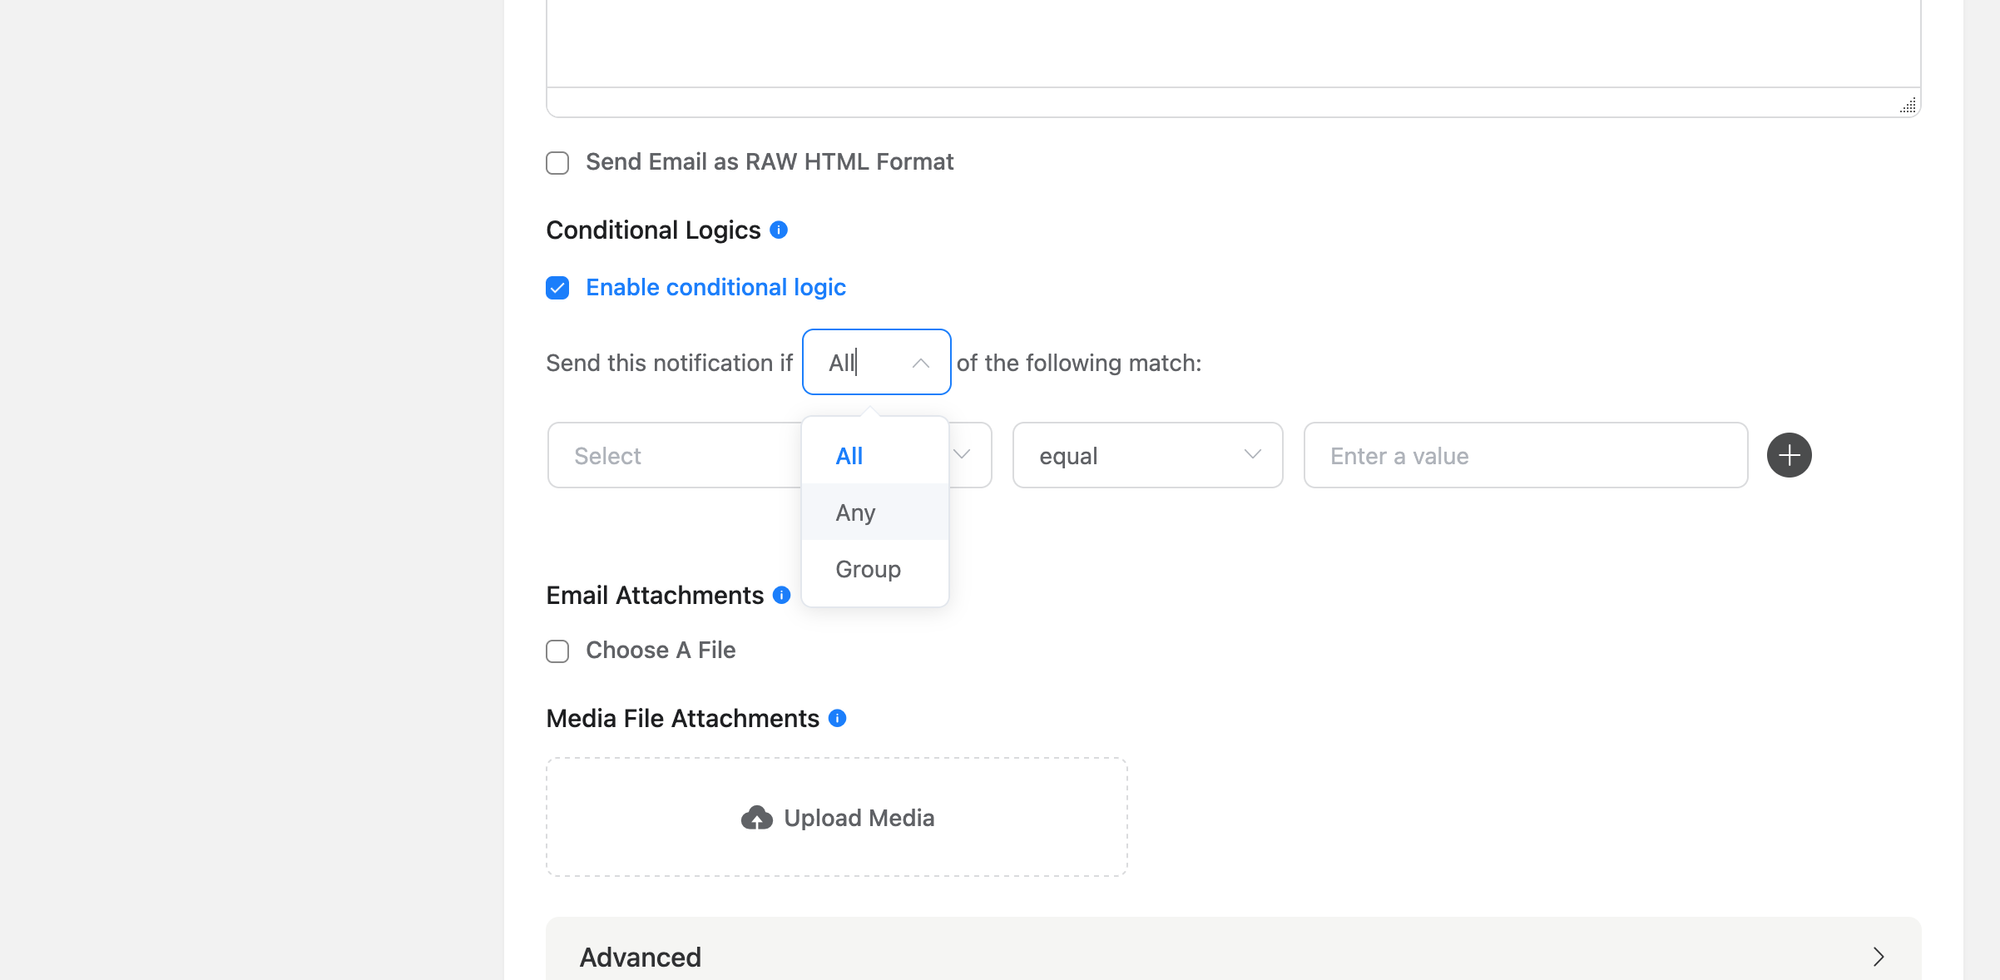
6) Select “Any” for “Send this notification if Any of the following match.”
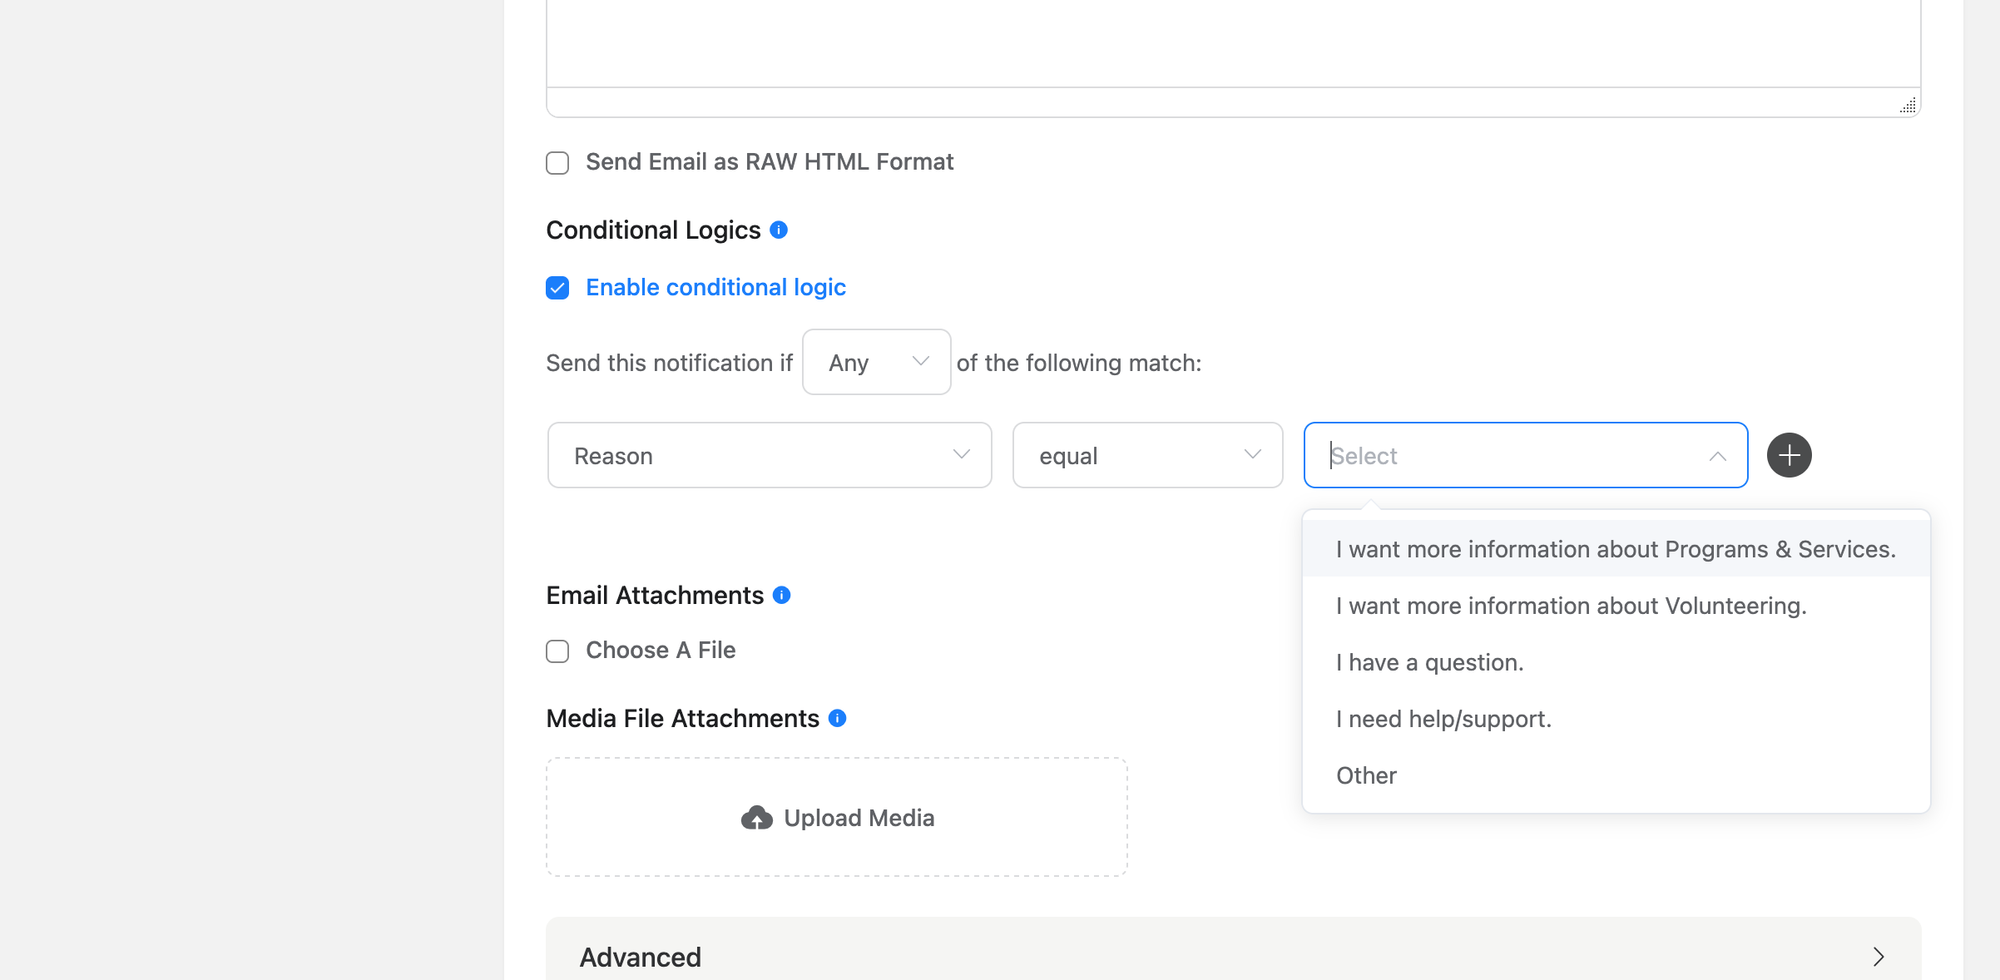
- Select the “Why are you contacting us?” field.
- Select equal.
- Select one of the field Option values. I selected the “I want more information” option for this example.
7) Click the Save Notification button.
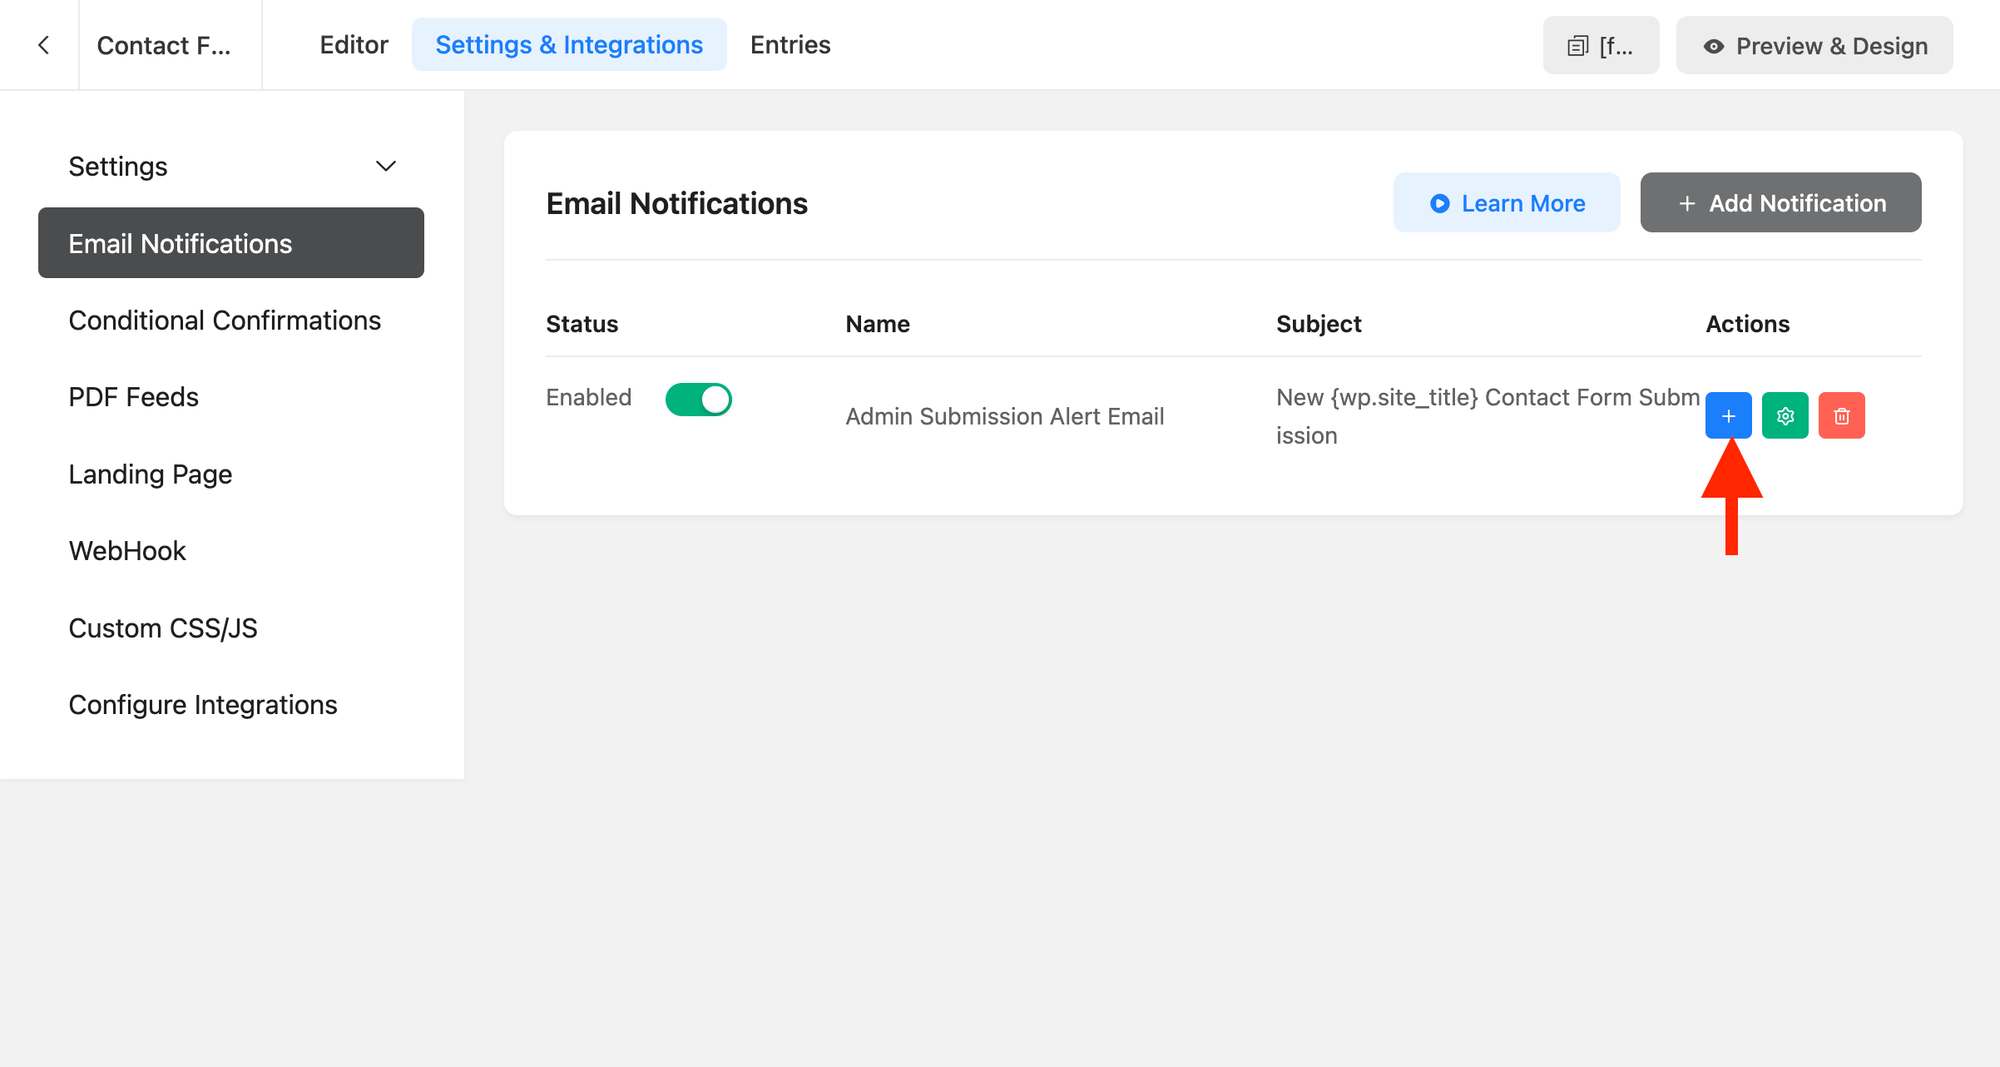
8) Click the blue + button to duplicate the Email Notification you just created.
9) Repeat the steps above, enter a different Send To Email and select a different field Option value.
Repeat steps 8 and 9 as many times as needed to create Email Notifications for all relevant staff/team members.
Conclusion
With this Contact Form Recipe you have created a Contact Form that allows users to submit:
- Questions.
- Information requests.
- Support requests.
- Comments, Testimonials, and Other requests.
This Contact Form also:
- Collects and stores form submission data.
- Sends form submission alert emails to admins and staff/team members.
- Allows admins to export form submission data.
- Allows form submission data to be used in email campaigns. (Example: Send an email to contacts who requested information on a Program/Service.)
Post a comment with any questions you have. Hire me if you want a custom Contact Form created for you.
Enjoy!