The goal of this tutorial is to setup a system that automatically sends an email (or a sequence of emails) to contacts who submit a form on your website.
For this example I’m using a WordPress powered website that has the Fluent Forms and Mail Mint plugins installed and activated. You can use other tools with similar features.
The trick is getting your website to tell your email marketing app when a form on your website is submitted, and having that event trigger a series of actions in your email marketing app. To do this you need an email marketing app that has an Automations (or Journey Builder) feature.
This tutorial teaches how to setup a system that:
You don’t need any special skills to follow the directions in this tutorial. You may need professional help setting up the Tools and Apps.
I share what I know to empower you with the skills needed to make your website better. You will get the following benefits by completing this tutorial:
Beyond completion of this tutorial you’ll know and understand what needs to be done in the future. And you’ll be better at managing professionals that you hire as you grow.
The following are required to complete this tutorial:
For this tutorial I use the following tools & apps.
Here is a list of Custom Fields that are needed for this system. You may wish to add other fields for marketing purposes.
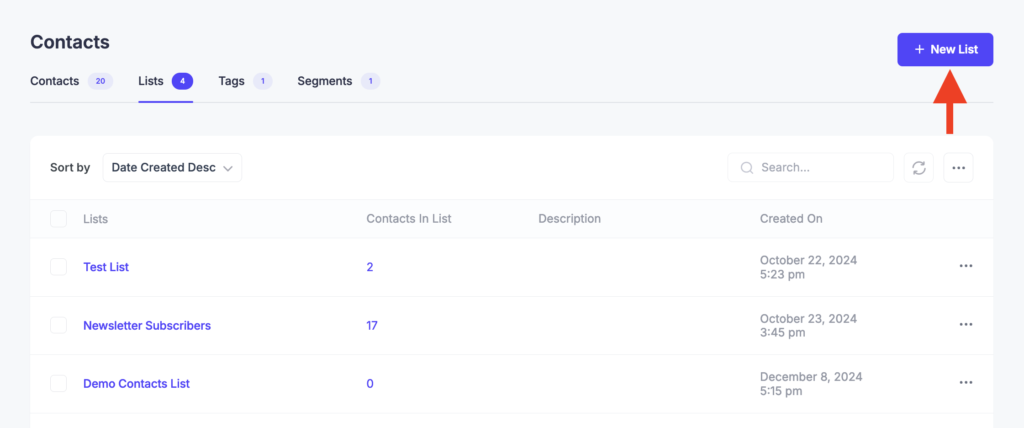
7. Go to Mail Mint > Contacts.
8. Click the New List button (top-right).
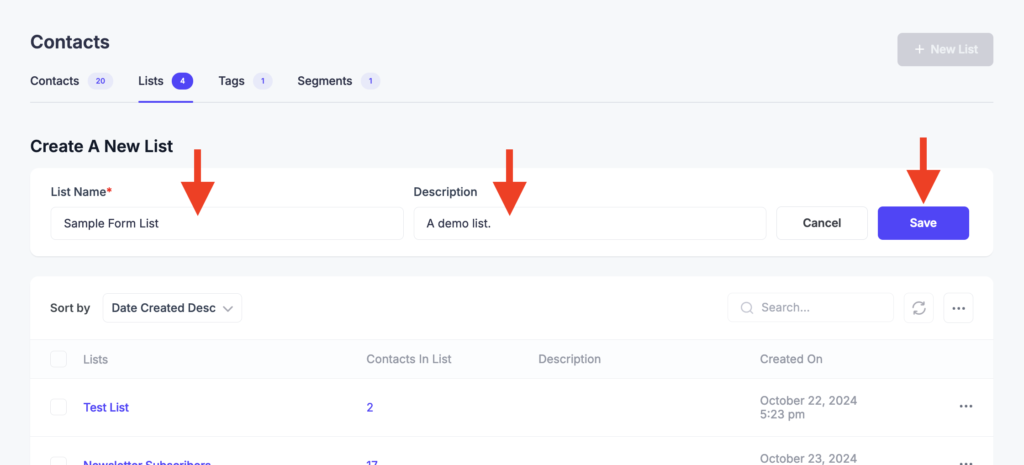
9. Enter a List Name.
10. Enter a Description (optional).
11. Click the Save button.
Next we will create a Tag that will be used to send emails to list contacts who have a Tag assigned to them in your list(s).
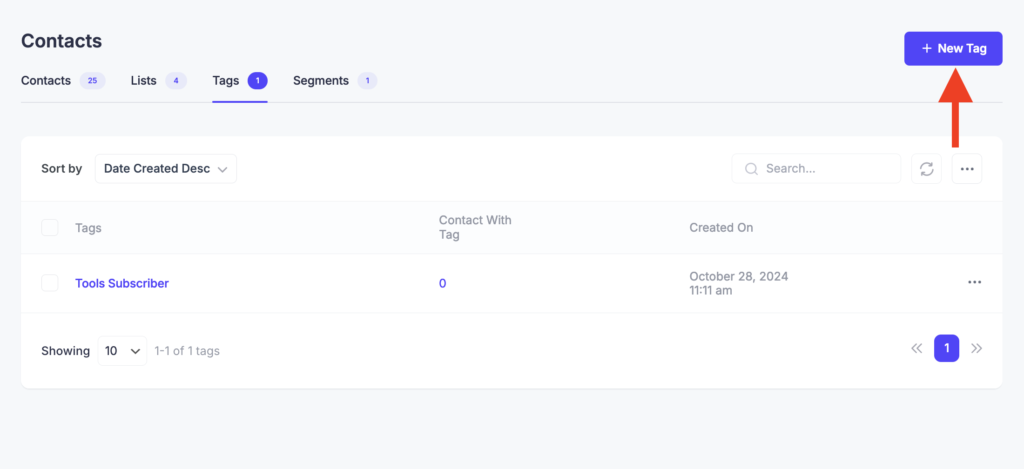
12. Go to Mail Mint > Contacts > Tags.
13. Click the New Tag button (top-right).
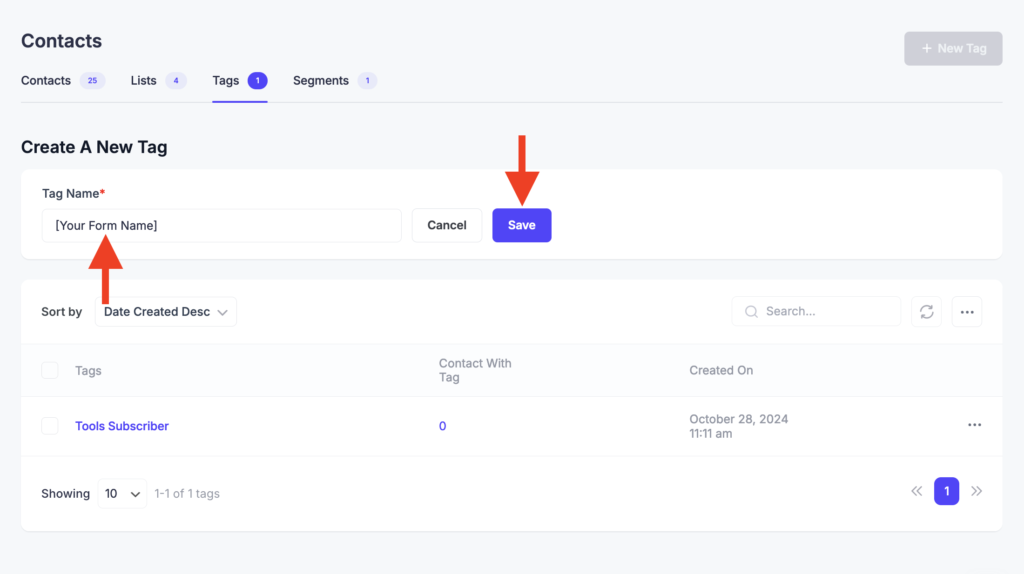
14. Enter a name/title into the Tag Name field. (Use the name/title of the source you want to track.)
15. Click the Save button.
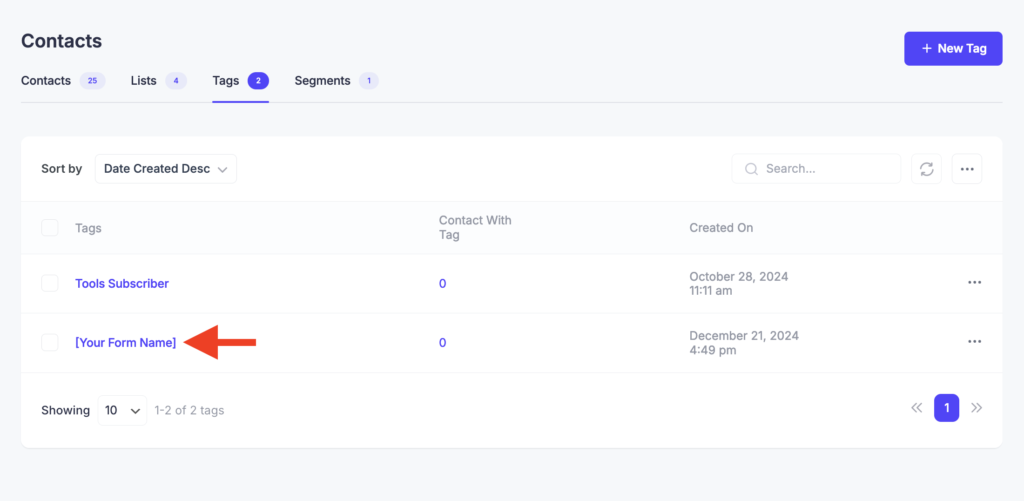
16. Confirm the new Tag Name appears in the Tags list.
Your Tag has been created.
Next, we want to create an Automation that automatically does a few things whenever a form is submitted:
By creating an automation you integrate the form on your website (made with Fluent Forms for this example) with an email list in your email marketing app. Automations are a feature of email marketing apps (Mail Mint for this example). Automations are sometimes also referred to as “Journeys” or “Journey Builders.”
Let’s get started creating an Automation.
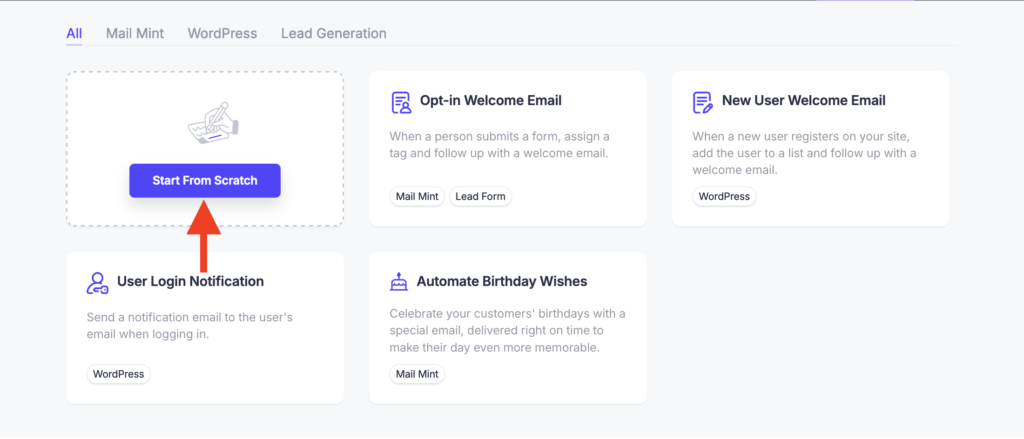
17. Go to Mail Mint > Automations
18. Click the Start From Scratch button.
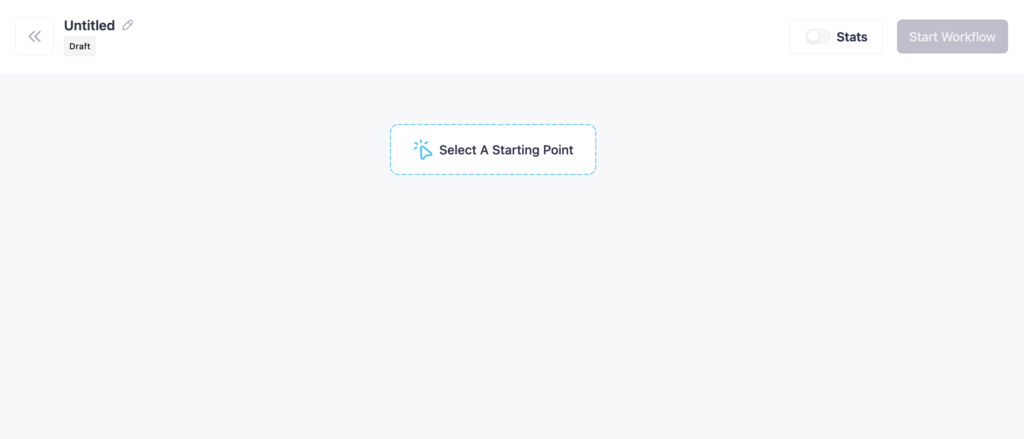
19. Click the Select A Starting Point object.
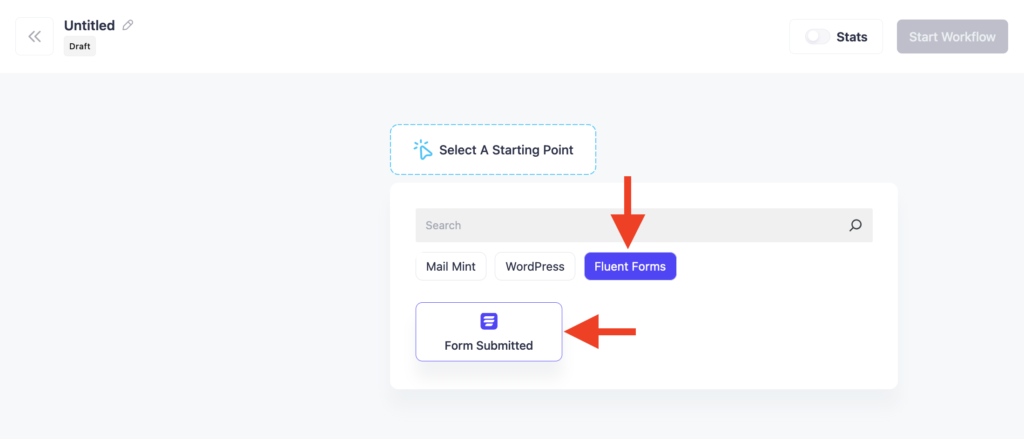
20. Click to select the Fluent Forms button.
21. Click the Form Submitted button.
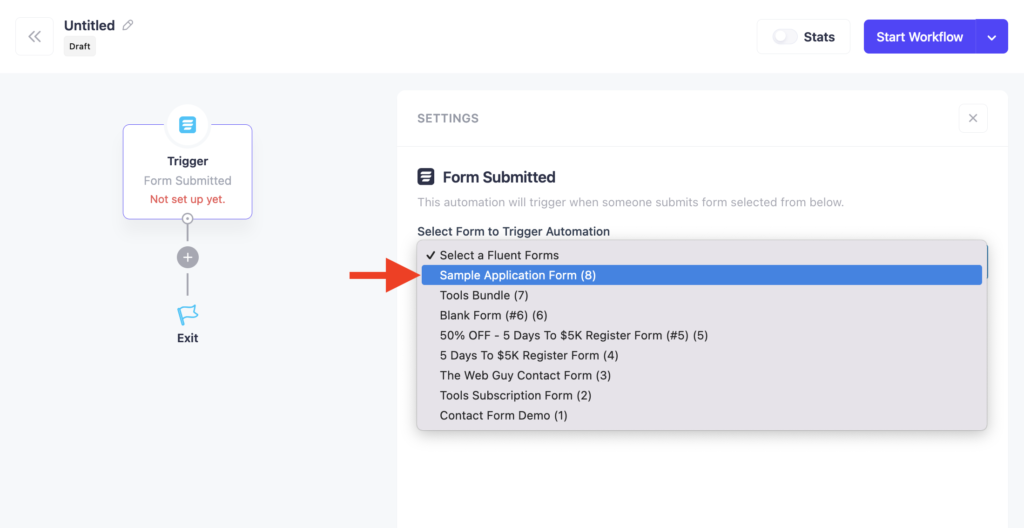
22. Click the Select Form to Trigger Automation menu and select a form. (I select the “Sample Automation Form” for this example.)
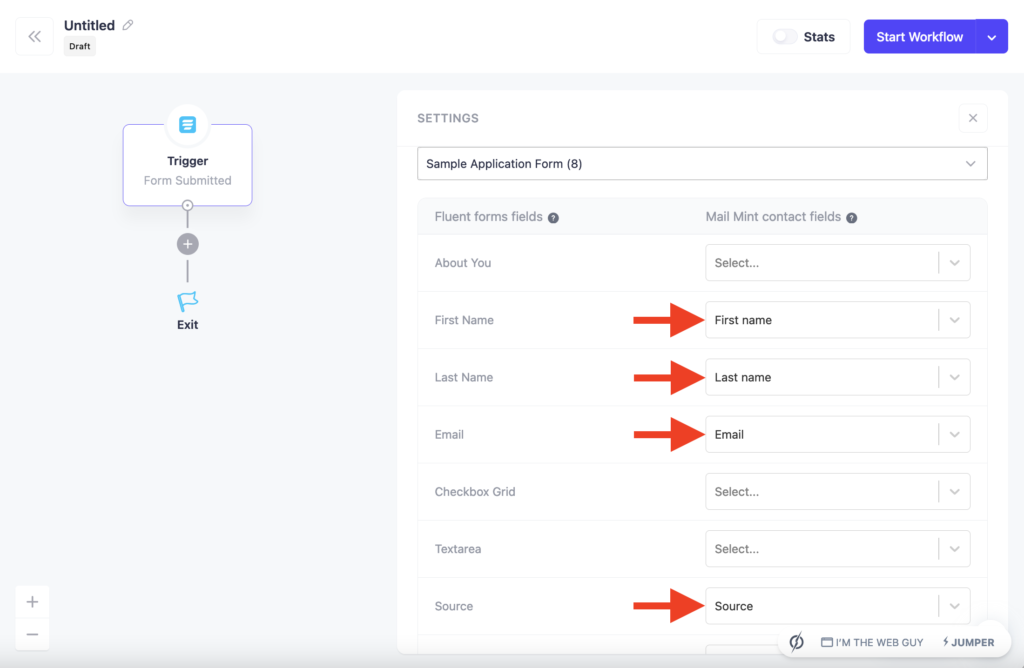
23. Map Fluent Forms Fields (left) to custom Contact Fields you created in Mail Mint.
For this example I map these fields:
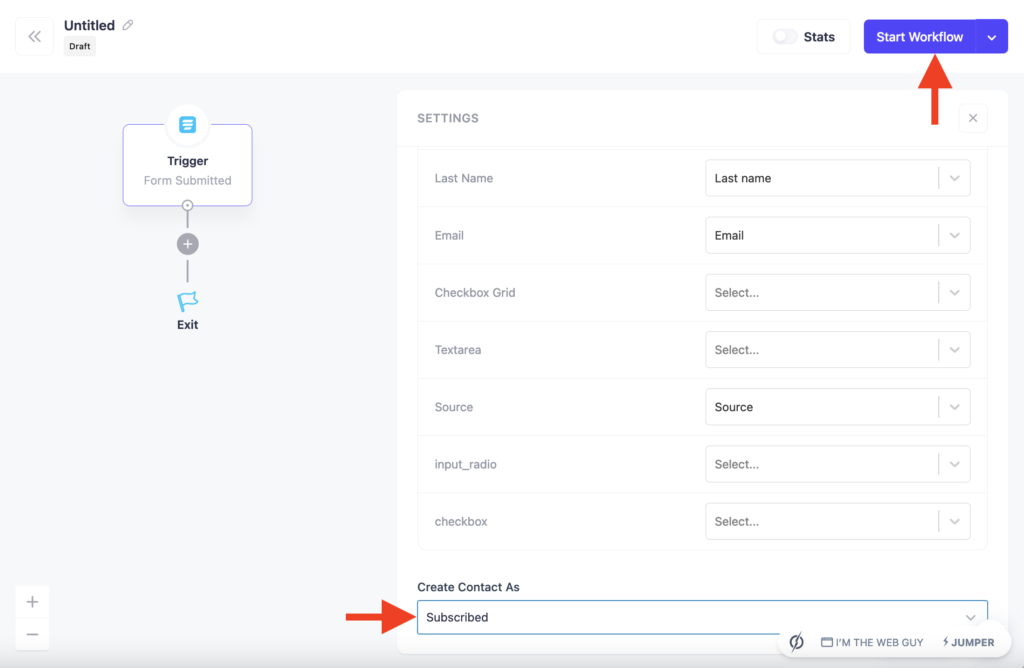
24. Scroll down the Settings panel, click the Create Contact As menu, and select Subscribed.
25. Click the Start Workflow button (top-right).
The Trigger step in your automation has been completed.
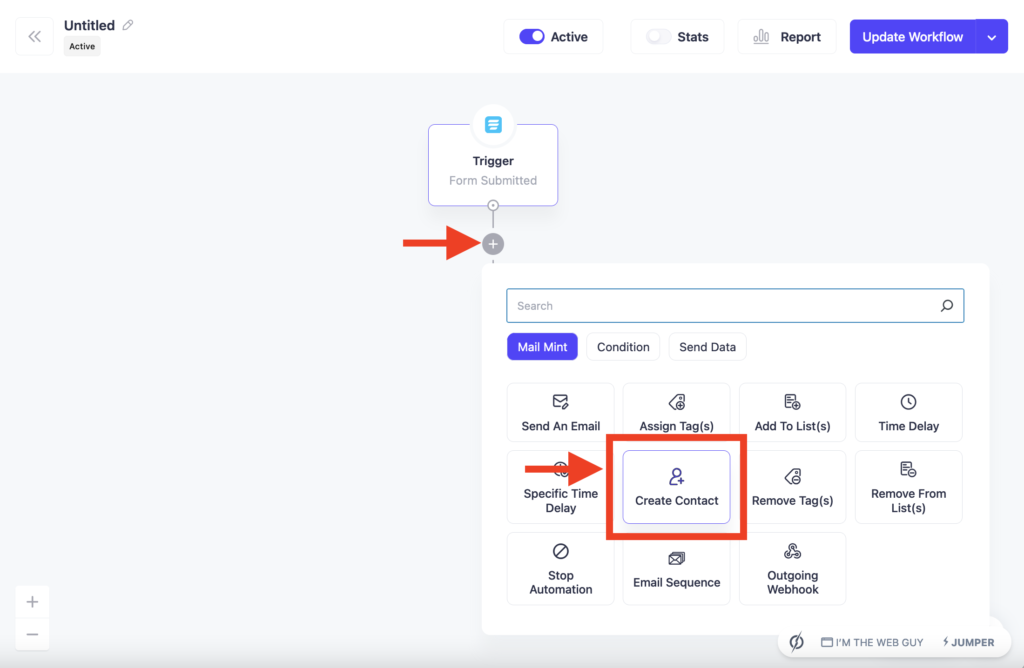
26. Next, click the gray + symbol
27. Click the Mail Mint button
28. Click the Create Contact button
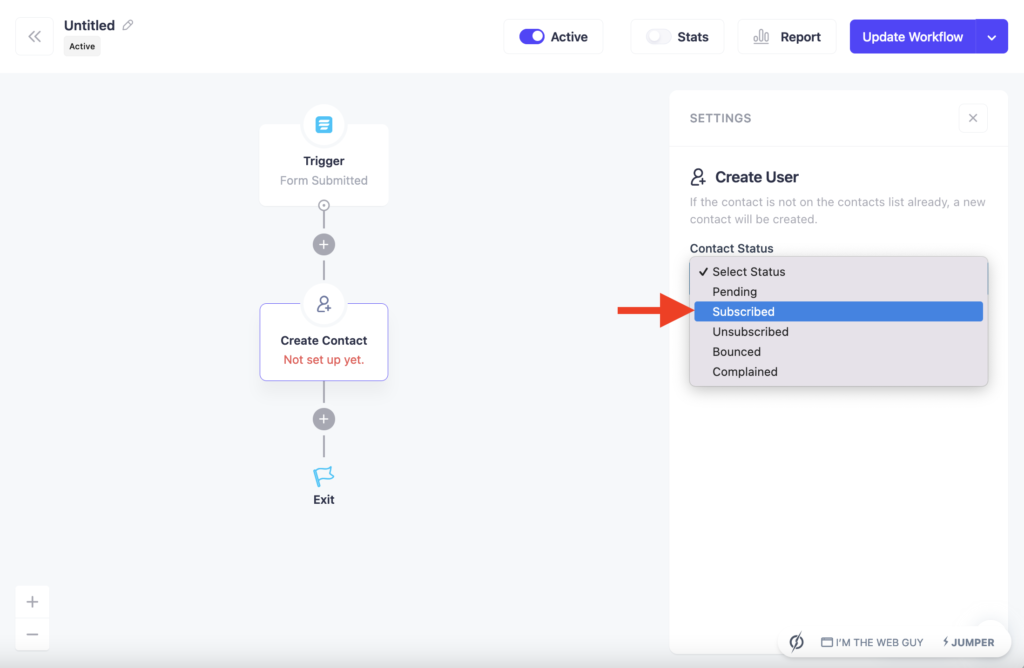
29. Click the Contact Status menu and select the Subscribed option.
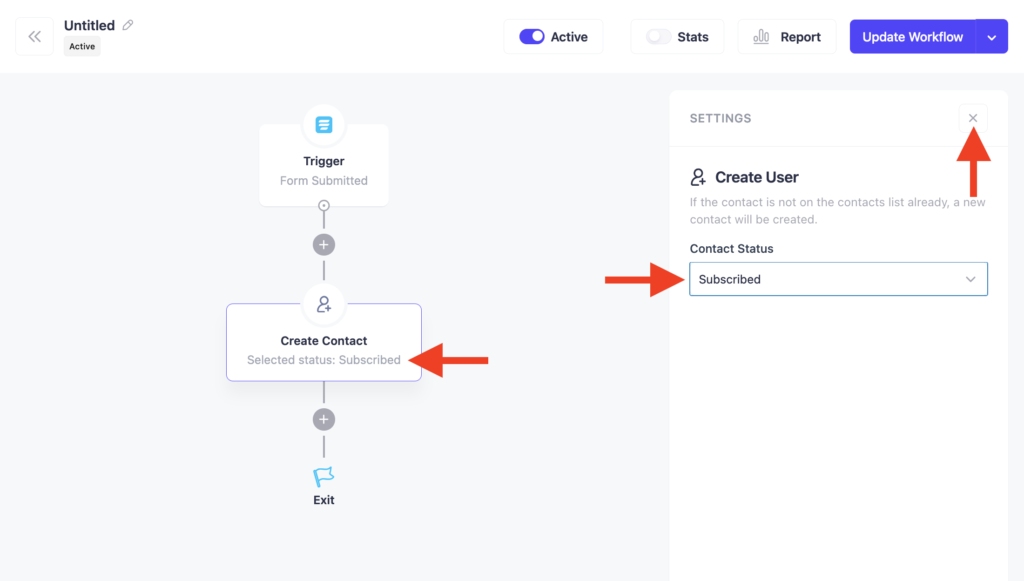
30. Verify the Create Contact step.
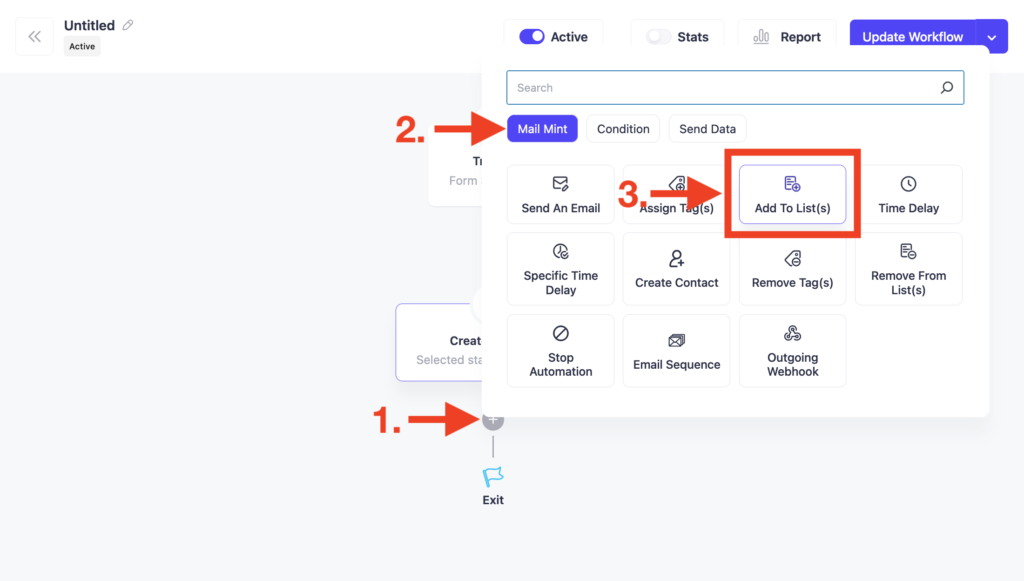
31. Click the gray + symbol (below the Create Contact step).
32. Click the Mail Mint button.
33. Click the Add To List(s) button.
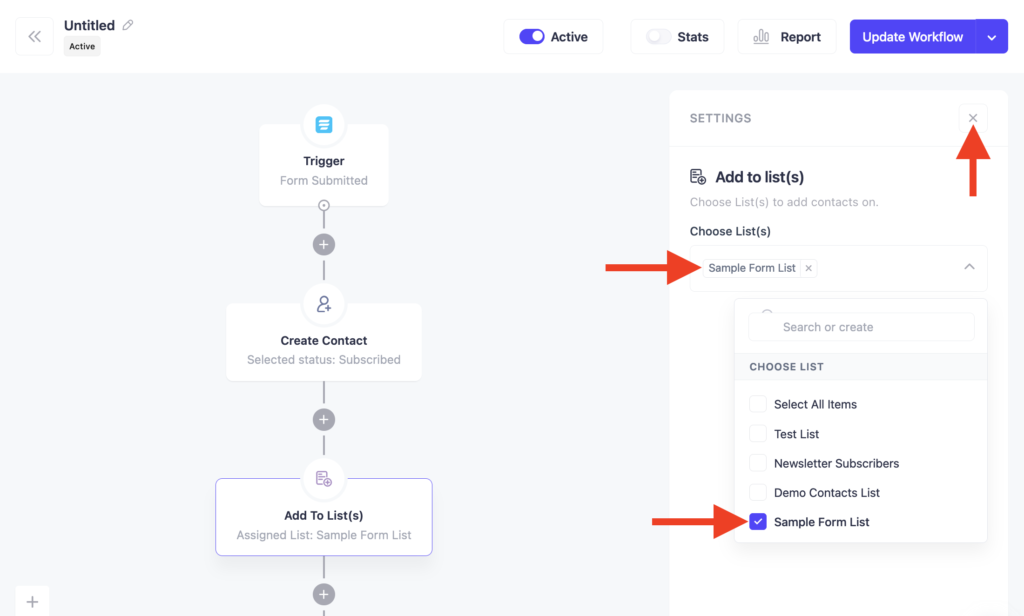
34. Click the Choose List(s) menu.
35. Click to Choose a list.
36. Click the x symbol to close the Choose List pane.

37. Click the gray + symbol (below the Add To List(s) step).
38. Click the Mail Mint button.
39. Click the Assign Tag(s) button.
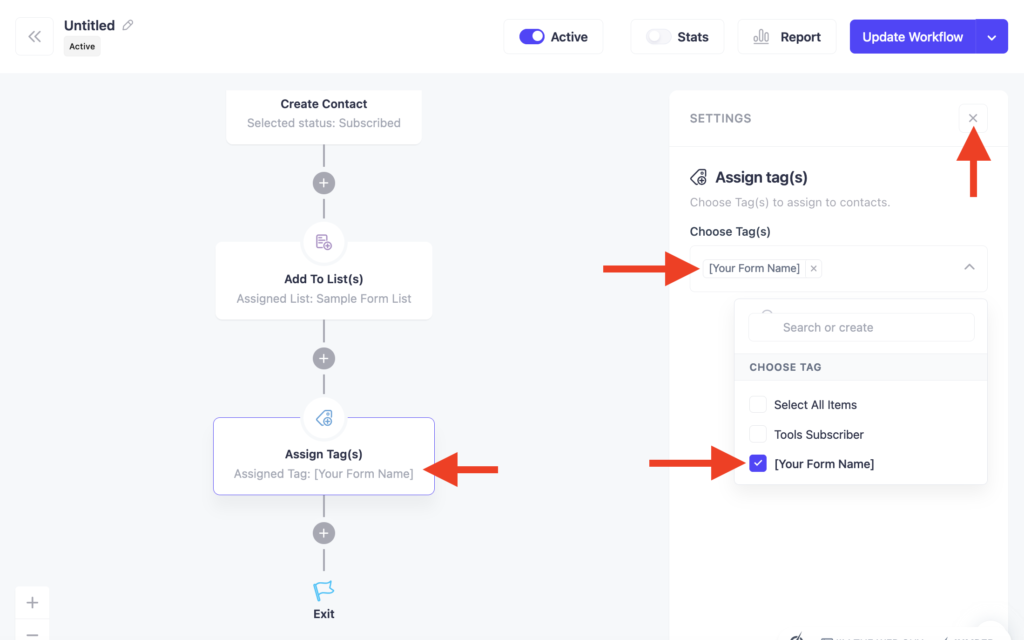
40. Click the Choose Tag(s) menu.
41. Click to Choose the Tag you created earlier.
42. Click the x symbol to close the Choose Tag(s) pane.
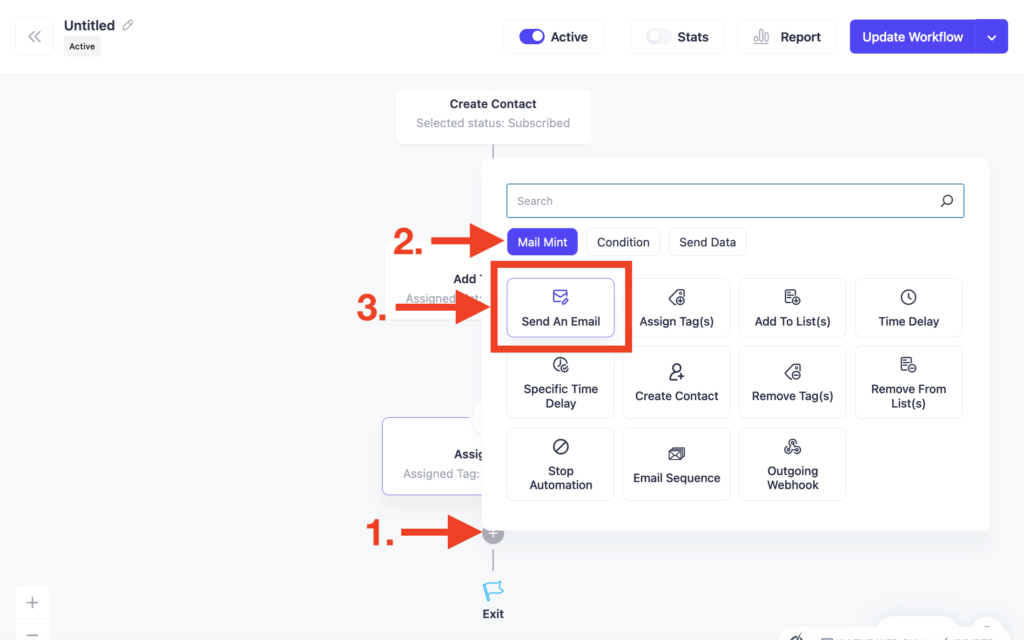
43. Click the gray + symbol (below the Assign Tag(s) step).
44. Click the Mail Mint button.
45. Click the Send An Email button.
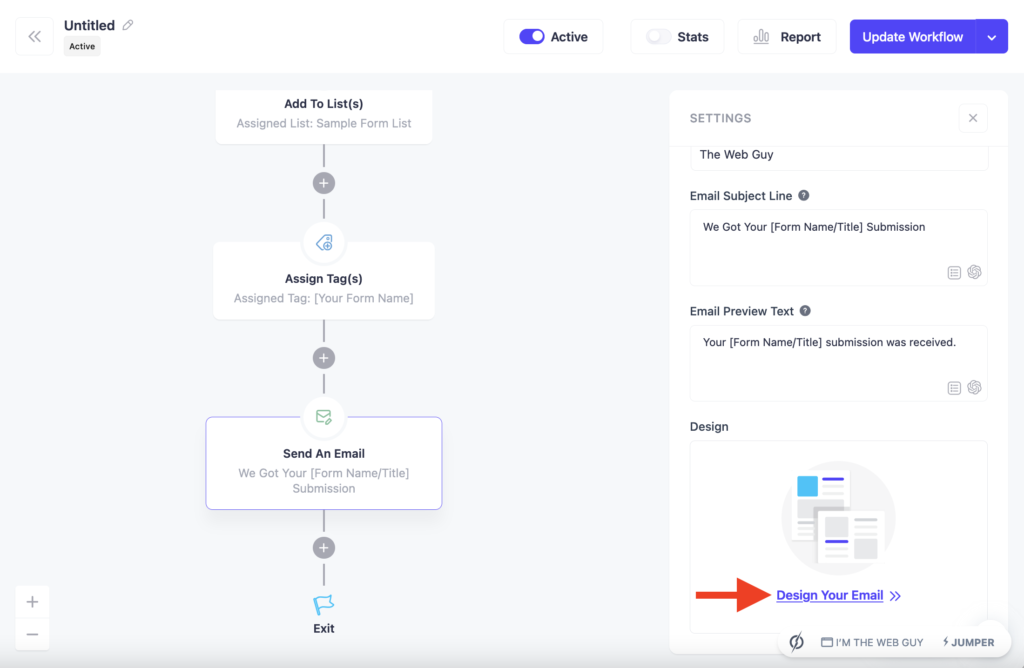
46. Enter a Email Subject Line.
47. Enter Email Preview Text.
48. Click the Design Your Email link.
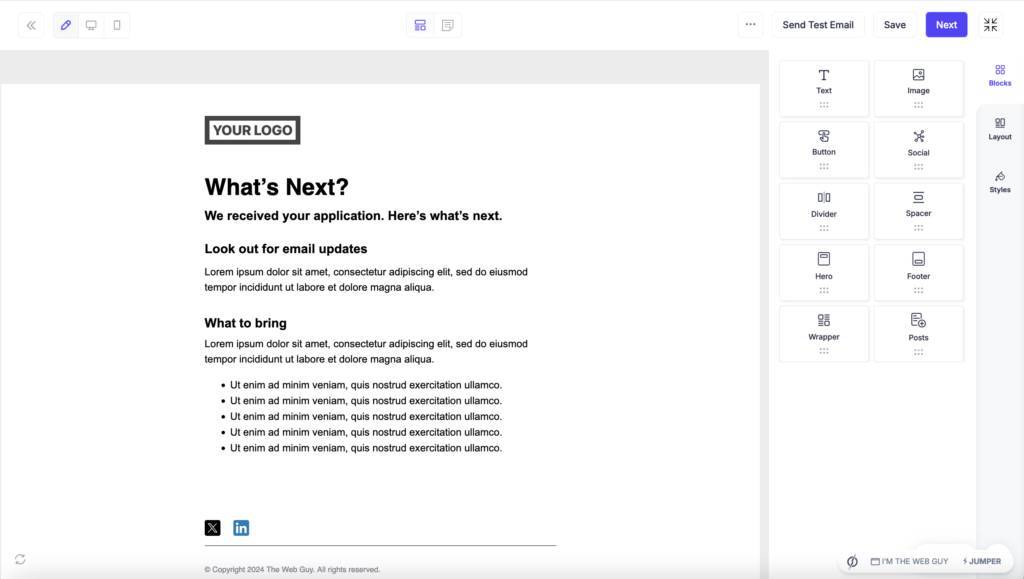
49. Edit the email. Add a logo, headline, text, and image(s) as needed. Use the drag-and-drop content Blocks that appear in the Blocks tab (right-side).
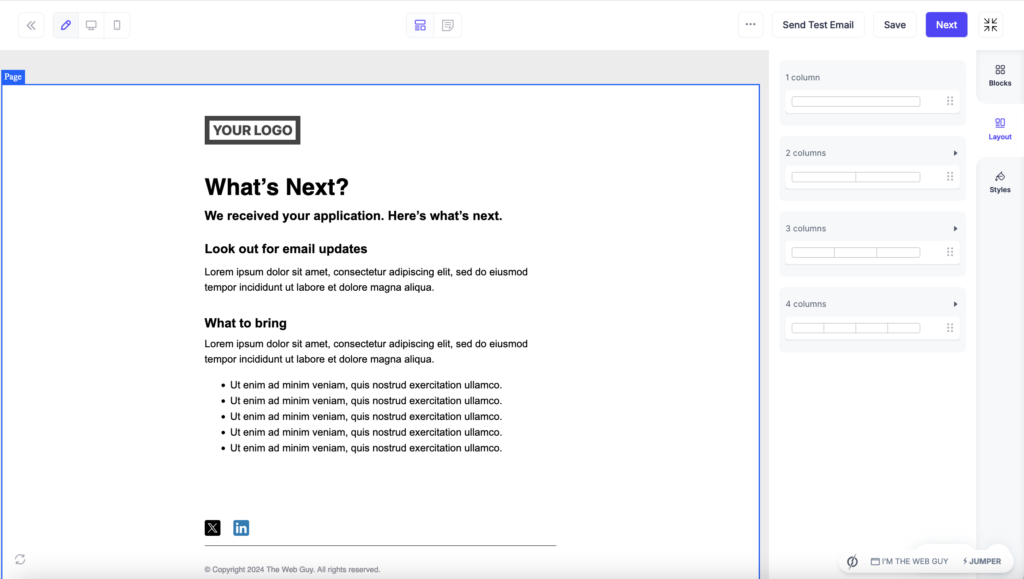
50. Use the drag-and-drop Layout blocks that appear in the Layout tab (right-side) as needed.
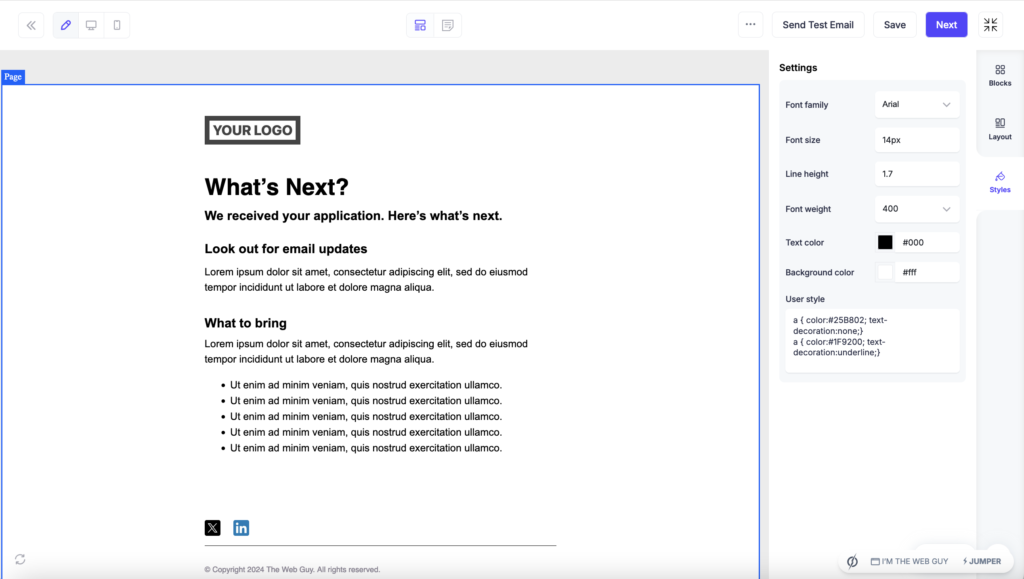
51. Edit the email style settings under the Styles tab (right-side). You can edit the Font family, Font size, Line height, Font weight, Text color, and Background color. Enter custom CSS into the User style field.
52. Click the Next button (top-right).
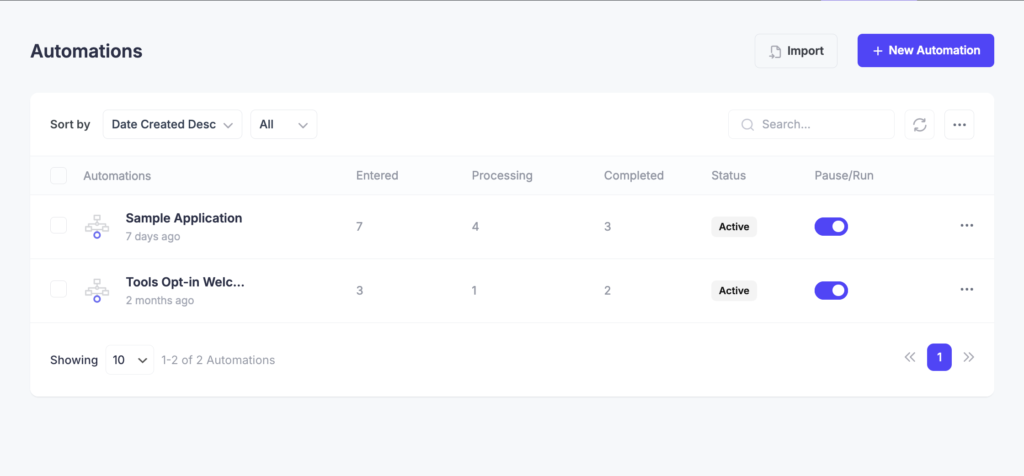
Your Automation setup is complete.
Here are the things to Test:
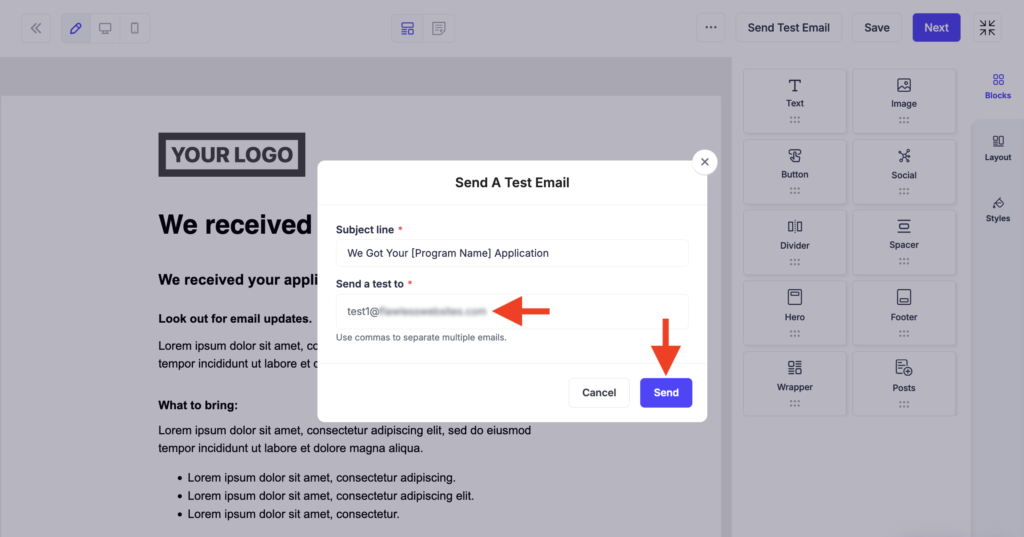
53. Click the Send Test Email button (top-right).
54. In the modal pane, enter a email address into the Send a test to field.
55. Click the Send button.
56. Confirm receipt of the Test email.
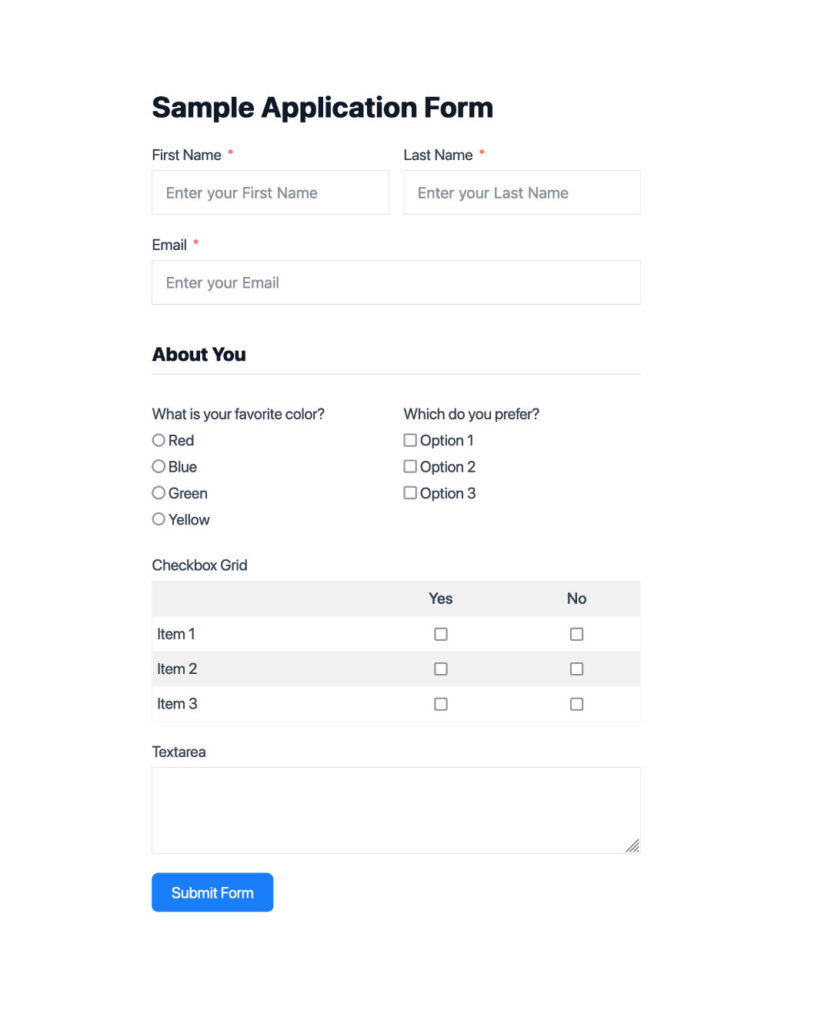
57. Go to the Form. Enter a First Name, Last Name, and Email (and any other required fields on your form), then click the Submit Form button.
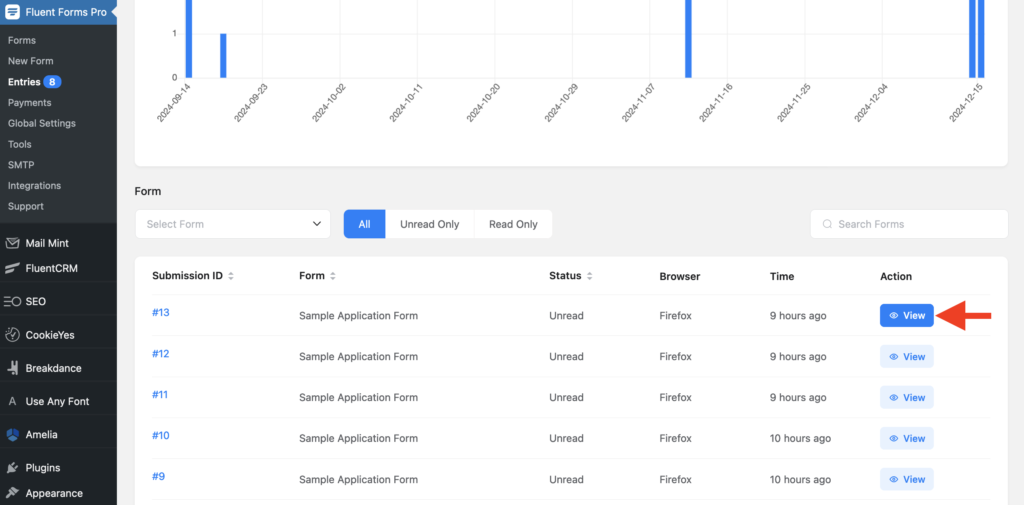
58. Go to Fluent Forms Pro > Entries.
59. Find the most recent submission entry and click the View button (right).
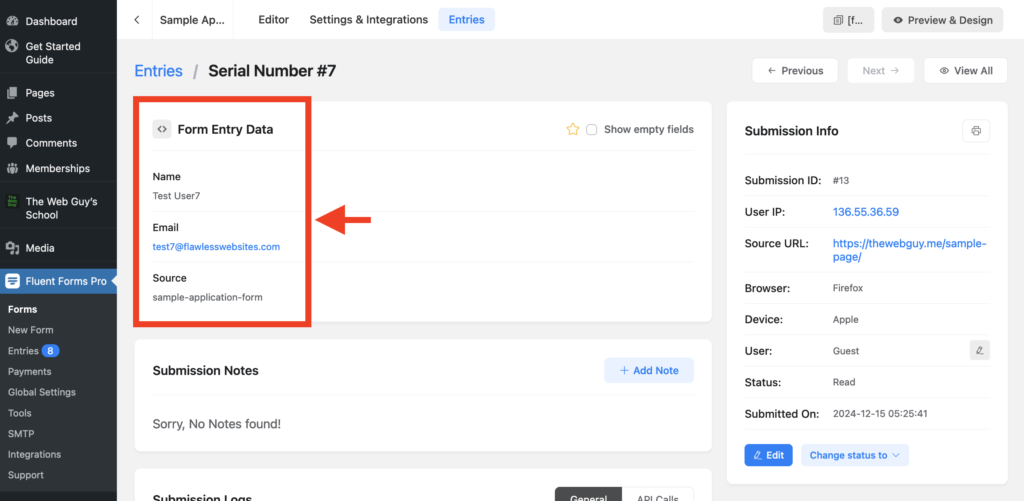
60. View the Form Entry Data and confirm the Name, Email, and Source field data.
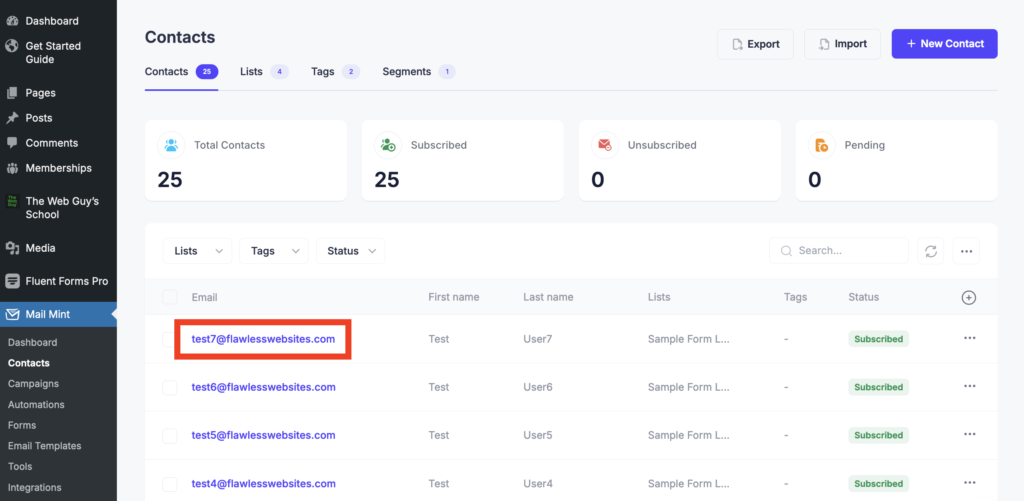
61. Go to Mail Mint > Contacts.
62. View the most recent contact and click the Email address (or the 3 Dots > Edit).
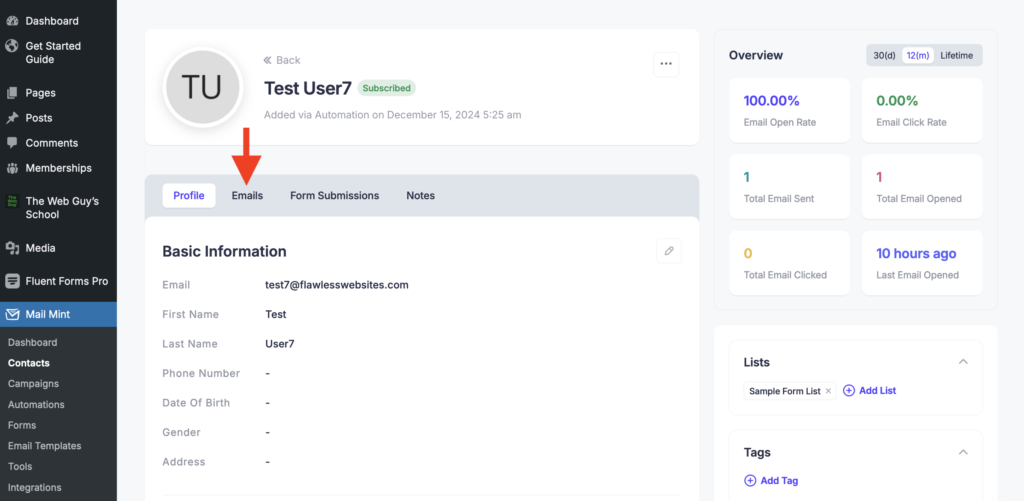
63. View the Basic Information for the contact.
64. Click the Emails tab (top) to confirm the automation email was sent.
This Issue #008 of The Web Guy Newsletter presents a step-by-step recipe you can use to automate the sending of emails to contacts when they submit a form on your website.
You can use different tools from the ones I used in this tutorial as long as they have similar features.
I hope this helps make your website better.
Follow Ed Phelps “The Web Guy” on LinkedIn and share your feedback.
Each issue features actionable tips that make your website better. Subscribe now.